Have you ever marveled at the stunning light displays created by programmable LED strips and wondered, “Could I do that?” Well, the answer is an emphatic “Yes!” With a little guidance on how to program LED light strips and the right tools, you too can bring vibrant color to your space.
The voice behind this guide is Tom, an expert in the LED industry since 2005. He’s spent countless hours programming LEDs, including programming LED lights and LED strip lights, to create all sorts of captivating visual experiences. His extensive knowledge and hands-on experience put him in the perfect position to break down this complex topic into digestible bits.
В этом исчерпывающем руководстве вы пройдете путь от основ, понимания необходимых компонентов до продвинутых концепций, которые заставят ваши светодиодные ленты танцевать цветами. Вы познакомитесь с инструментами программирования, примерами кода, общими способами устранения неисправностей и многим другим, что сделает процесс обучения похожим на захватывающую горку!
Теперь перед вами мир программируемых светодиодных ламп. Не терпится раскрыть творческую свободу и раскрасить пространство светом? Давайте окунемся с головой!
Введение: Магия светодиодных лент
Добро пожаловать в яркий мир Светодиодные ленты - Вселенная, где творчество и технологии сливаются воедино, создавая динамичный спектр цвета и света. Сегодня мы рассмотрим, как раскрыть весь потенциал этих универсальных гаджетов, погрузившись в интригующий процесс программирования светодиодных лент. К концу этого подробного руководства вы сможете преобразить свое пространство с помощью завораживающих, индивидуальных световых дисплеев. Но прежде чем перейти к техническим аспектам, давайте разберемся, что такое светодиодные ленты и почему их программирование может стать увлекательным занятием.
Раскрытие возможностей программирования светодиодных лент
Зачем программировать светодиодные ленты?
Итак, зачем программировать светодиодные ленты? По своей сути светодиодные ленты являются невероятно настраиваемыми, что открывает безграничные возможности для создания индивидуальных световых решений. При программировании вы получаете полный контроль над их поведением - от цветовой гаммы и переходов до яркости и пульсации. Независимо от того, создаете ли вы подсветку для гостиной или организуете ослепительное световое шоу на мероприятии, программируемые светодиодные ленты - это ваш холст, способный вызывать эмоции, привлекать внимание или создавать особую атмосферу.
Применение RGB-диодов: Раскрытие творческой свободы
Помимо очевидного применения в дизайне и декоре интерьеров, программируемые светодиодные ленты нашли свое применение в различных отраслях. Они используются в художественных инсталляциях для создания потрясающих визуальных эффектов, в фотографии для создания световых картин, в носимых вещах, таких как костюмы или аксессуары, для улучшения эстетики, и даже в рекламе, где они могут быть запрограммированы для отображения логотипов или рекламных сообщений. Благодаря возможности управления RGB-диодами (красный, зеленый, синий) творческая свобода становится поистине безграничной.
Чего вы достигнете к концу этого руководства?
В этом руководстве мы рассмотрим основы компонентов светодиодных лент и овладеем искусством их программирования с помощью Arduino Uno и библиотеки FastLED. Будь вы новичок, который только начинает работать, или любитель, стремящийся отточить свои навыки, это руководство даст вам ноу-хау, позволяющее анимировать светодиодные ленты таким образом, чтобы они дополняли ваше пространство и видение.
Начало работы: Необходимые инструменты и компоненты
Прежде чем приступить к программированию, давайте убедимся, что у нас есть все необходимые компоненты:
Определение различных типов программируемых светодиодных лент
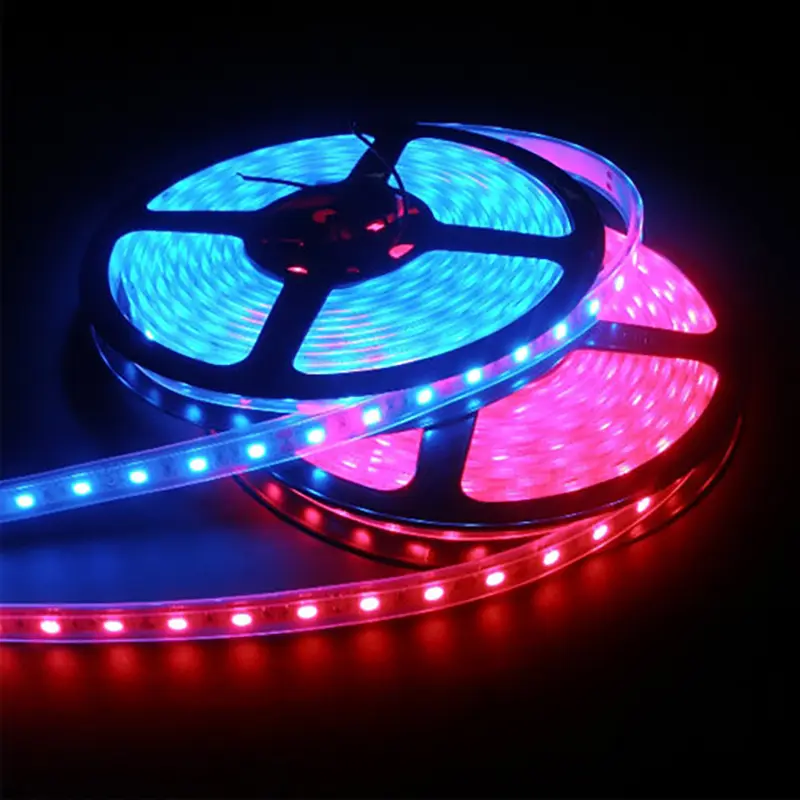
Светодиодные ленты бывают нескольких типов, наиболее распространенными являются RGB-ленты. Эти ленты содержат отдельные красные, зеленые и синие светодиоды, что позволяет создавать широкий спектр цветов за счет смешения цветов. Еще одним шагом вперед являются RGBW-ленты, в которые добавляется специальный белый светодиод, обеспечивающий более качественные белые тона и дополнительную яркость.
Основные компоненты для программирования светодиодных лент
Светодиодная лента
Для начала вам понадобится светодиодная лента. Для начинающих идеально подходит метровая лента с 30-60 светодиодами.
Источник питания и штанговый разъем
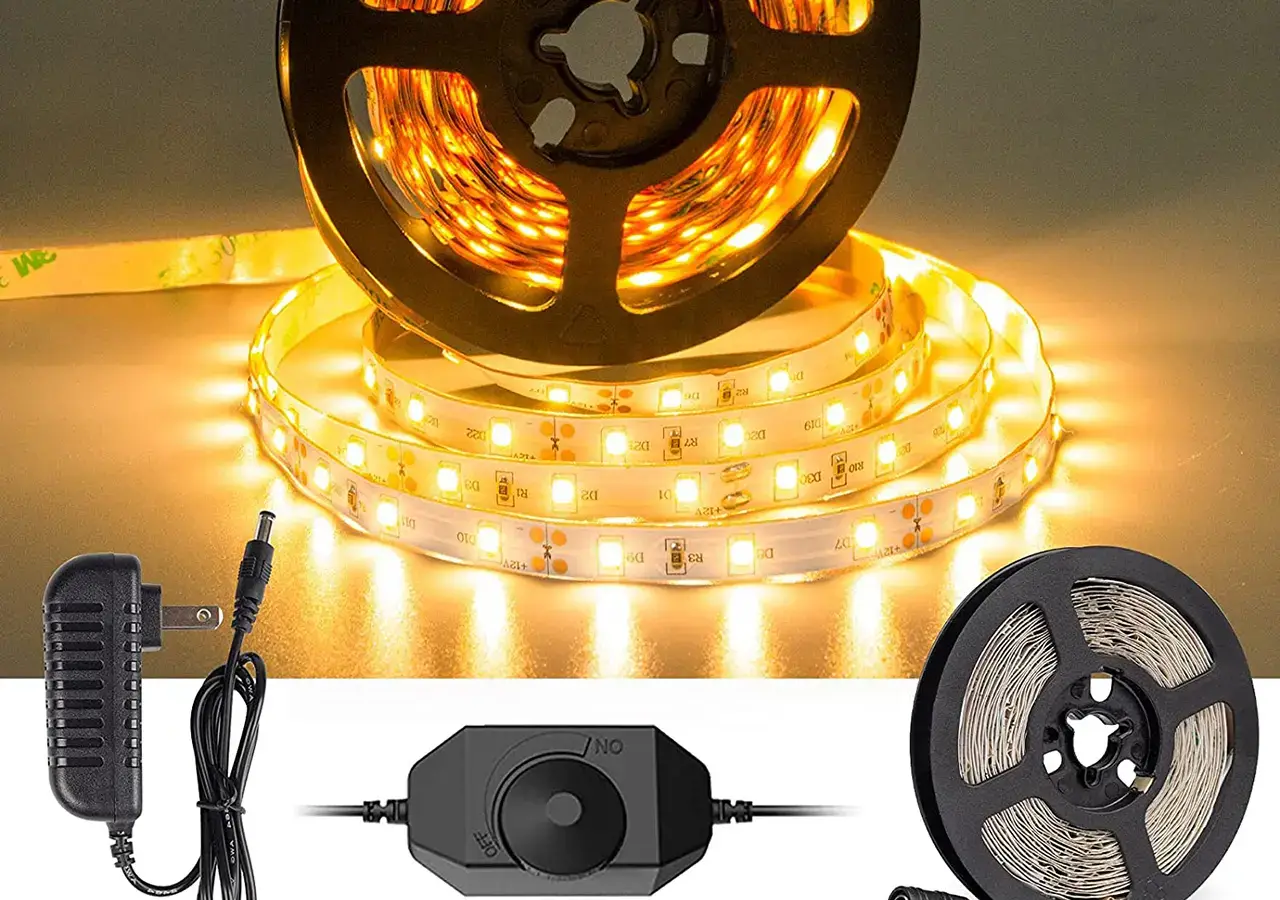
Для работы светодиодных лент необходим соответствующий источник питания. Потребляемая мощность может быть рассчитана исходя из длины ленты и потребляемой светодиодами мощности. Обычно используется источник питания 5 В, а для удобства подключения потребуется гнездо типа "бочонок".
Плата Arduino Uno
Эта микроконтроллерная плата будет служить "мозгом" нашей работы. Именно ее мы будем программировать для управления светодиодной лентой.
Провода разъемов
Коннекторные провода используются для установления соединения между Arduino и светодиодной лентой.
Портативный блок питания (опция)
Для обеспечения мобильности светодиодной установки удобно использовать портативный блок питания.
Какую ленту и контроллер выбрать? RGB или RGBW?
Выбор между Полосы RGB и RGBW сводится к потребностям вашего проекта. Если для вашей установки важен действительно белый свет или повышенная яркость, то лучшим выбором будет RGBW-лента. Однако для большинства других применений RGB-лента является более простым и доступным решением.
Установка сцены: Сборка компонентов
Теперь, когда все компоненты готовы, давайте подготовим почву для программирования
Подготовка светодиодной ленты
Подготовка светодиодной ленты заключается в ее разрезании на отрезки необходимой длины, причем разрезы должны выполняться в точках, отмеченных на ленте. После отрезания припаяйте головки штырьков к местам разъемов ленты для удобства крепления к проводам.
Подключение источника питания
Подключите источник питания к светодиодной ленте через бочкообразный разъем. Красный провод от разъема должен быть подключен к 5 В ленты, а черный - к GND.
Настройка платы Arduino
Питание платы Arduino будет осуществляться через USB-соединение с компьютером. Перед подключением к светодиодной ленте убедитесь, что на компьютере установлено соответствующее программное обеспечение Arduino IDE (программа для программирования светодиодных лент).
Подключение компонентов
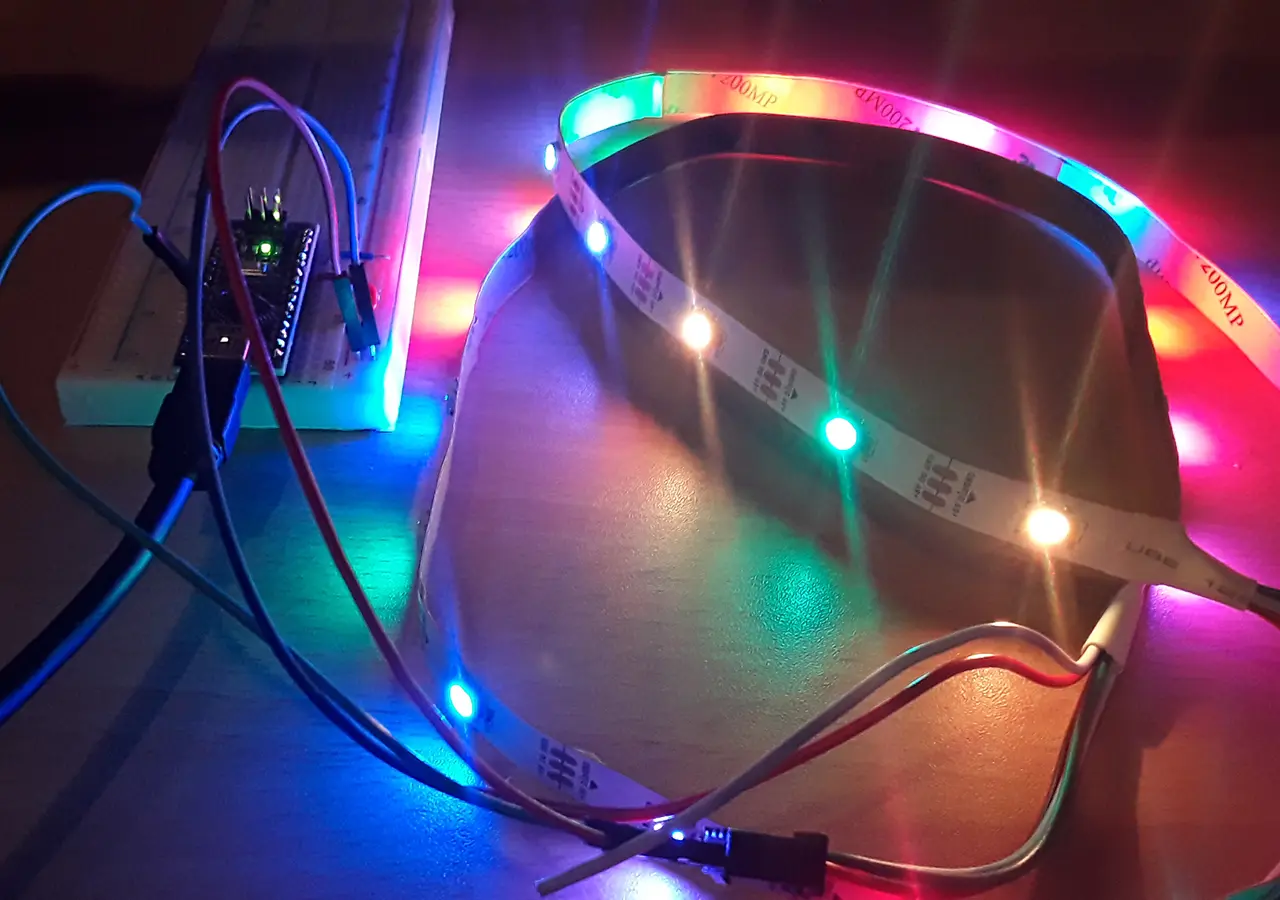
Для подключения Arduino к светодиодной ленте соедините входной вывод данных ленты с одним из цифровых выводов Arduino. Для питания подключите 5 В и GND Arduino к соответствующим точкам на светодиодной ленте.
Управление: Программирование светодиодных ламп
Теперь, когда сцена подготовлена, пора приступать к программированию.
Средства программирования и их установка
Программное обеспечение Arduino
Интегрированная среда разработки (IDE) Arduino - это платформа, на которой вы будете писать и загружать свой код. Ее можно бесплатно загрузить с сайта Arduino.
Библиотека FastLED
FastLED is an Arduino library specifically designed for LED strip programming. It simplifies the coding process and is compatible with a wide range of LED chipsets. You can install it directly from the Arduino IDE.
Chipset and Platform Support
Before coding, please make sure that the FastLED library supports your LED strip’s chipset.
Understanding the Basics of LED Strip Programming
Overview of C++ Code for strip light LED programming
With the Arduino software and FastLED library installed, you’ll write your code in C++, a popular programming language. How to program led lights with arduino? Here’s a simple program that sets up an LED strip with 60 LEDs on pin 6 and fills the strip with red color:
#define NUM_LEDS 60
#define DATA_PIN 6
CRGB leds[NUM_LEDS];
void setup() {
FastLED.addLeds(leds, NUM_LEDS);
}
void loop() {
fill_solid(leds, NUM_LEDS, CRGB::Red);
FastLED.show();
}
Diving Deep: Exploring the Code Line by Line
This program begins by including the FastLED library, which gives access to its powerful functions. Next, two constants are defined: NUM_LEDS и DATA_PIN, representing the number of LEDs and the pin number where the LED strip is connected, respectively.
Then, an array leds of type CRGB is created to store the color data for each LED. In the setup function, the FastLED.addLeds function is called to initialize the LED strip. The parameters specify the type of LED strip (NEOPIXEL in this case), the data pin number, and the LEDs array.
Сайт loop function, which runs continuously, first fills the array with a solid color (red, in this case) using the fill_solid function. Finally, the FastLED.show function updates the actual LED strip to match the array data.
Your First LED Strip Program: Making an LED Blink
Now that we’ve walked through a basic LED strip program, let’s create a more interactive one: making an LED blink.
Crafting the Code
Here’s a simple program that makes the first LED on the strip blink red:
#define NUM_LEDS 60
#define DATA_PIN 6
CRGB leds[NUM_LEDS];
void setup() {
FastLED.addLeds(leds, NUM_LEDS);
}
void loop() {
leds[0] = CRGB::Red; // turn the LED on
FastLED.show();
delay(500); // wait for half a second
leds[0] = CRGB::Black; // turn the LED off
FastLED.show();
delay(500); // wait for half a second
}
Uploading the Code to the Arduino Board
With the code written, it’s time to upload it to the Arduino. Connect your board to your computer via USB, then click the upload button (the right-facing arrow) in the Arduino IDE. Once uploaded, your first LED should start blinking red!
Celebrating Your First Success: Watching Your LED Blink
There you have it – your first interactive LED strip program! Take a moment to celebrate this achievement. You’ve now programmed an LED strip to blink – a simple but significant step towards more intricate lighting designs.
Going Beyond Basics: Advanced Programming Concepts
Now that we’ve got the basics down, let’s dive into some more advanced programming concepts.
Understanding RGB Values and Brightness Pulse-Width Modulation
Each LED in an RGB LED strip combines three smaller LEDs – one red, one green, and one blue. We can create virtually any color by varying the brightness of these three colors.
Brightness is controlled using a technique called Pulse-Width Modulation (PWM), which involves switching the LED on and off very quickly, with the percentage of time spent on versus off determining the brightness. For example, if an LED is on 50% of the time and off 50% of the time, it will appear half as bright as an LED on 100% of the time.
Making Multiple LEDs Blink
Making multiple LEDs blink involves setting the color of the desired LEDs to CRGB::Black и CRGB::Red in a cycle. For example, if you wanted to make the first ten LEDs blink, you would do something like this:
leds[i] = CRGB::Red; // turn the LEDs on
}
FastLED.show();
delay(500); // wait for half a second
for(int i = 0; i < 10; i++) {
leds[i] = CRGB::Black; // turn the LEDs off
}
FastLED.show();
delay(500); // wait for half a second
Creating Complex LED Patterns and Effects
With the FastLED library, creating complex LED patterns and effects is relatively simple. Here, we’ll provide examples of three different effects: a rainbow cycle, a chase effect, and a snowflake effect.
Rainbow Cycle
A rainbow cycle is an effect where the colors of the rainbow cycle through the LEDs. Here’s how you could do it:
static uint8_t hue = 0;
for(int i = 0; i < NUM_LEDS; i++) {
leds[i] = CHSV(hue++, 255, 255);
}
FastLED.show();
delay(20);
}
Chase Effect
A chase effect is where a single lit LED appears to “run” down the strip. Here’s how you could do it:
static int lead_dot = 0;
leds[lead_dot++] = CRGB::Black; // turn the previous LED off
leds[lead_dot] = CRGB::Red; // turn the next LED on
FastLED.show();
delay(100);
if(lead_dot >= NUM_LEDS) lead_dot = 0;
}
Snowflake Effect
A snowflake effect is where random LEDs turn on and off to mimic falling snow. Here’s how you can do it:
for(int i = 0; i < NUM_LEDS; i++) { if(random(10) > 5) {
leds[i] = CRGB::White;
} else {
leds[i] = CRGB::Black;
}
}
FastLED.show();
delay(100);
}
Advanced LED Strip Programming Concepts
As you delve deeper into the world of LED strip programming, a few more sophisticated concepts come into play. These include variables, arrays, and functions, which offer you greater control over your LED strips. Variables allow you to store and manipulate data like the brightness or color of an LED. Arrays, on the other hand, let you manage multiple LEDs at once, opening up possibilities for intricate light patterns. Lastly, functions provide reusable code snippets that perform specific tasks, such as rotating colors or creating animation effects.
Troubleshooting Your Journey: Common Issues and Their Solutions
Just like any journey, LED strip programming comes with its own set of challenges. Thankfully, most of these hurdles are common and can be quickly resolved.
Common Errors and Their Solutions
One common issue is inconsistent LED brightness, often due to inadequate power supply. To fix this, ensure your power source can handle the total current draw of your LEDs. Another typical problem is LED strips not lighting up, usually because of incorrect wiring or a damaged LED. In such cases, double-check your connections and replace any non-functioning LEDs.
Best Practices for Avoiding Errors
To mitigate errors, it’s essential to verify your wiring before powering up and to regularly check your code for errors. Also, always disconnect your setup from power when making modifications and use resistors to prevent LEDs from burning out.
Unleashing Full Potential: Next Steps in LED Strip Programming
As you grow more comfortable with the basics of LED strip programming, it’s time to explore more advanced opportunities and unleash the full potential of your setup.
LED Power Draw and USB Current Limit: Balancing Performance and Safety
Balancing performance and safety is key. You must always consider the power draw of your LED strip and the USB current limit of your Arduino board. If the LED power draw exceeds the board’s limit, it could overheat or even fail.
Gamma Correction: Fine-Tuning Your Lighting Experience
Gamma correction helps fine-tune your lighting experience by making colors appear more consistent to the human eye. It corrects the non-linear relationship between the light intensity and the electrical voltage driving the LEDs.
Exploring the Full Potential of LED Strip Lights
From creating mesmerizing light shows synced to music to integrating your LED strips into a smart home system for automated control, the possibilities are endless when you fully explore LED strip programming.
Часто задаваемые вопросы
Can you program an LED strip?
Absolutely! You can program an LED strip using a controller like the Arduino Uno Board. With the aid of coding tools like the Arduino Software (IDE) and libraries such as FastLED, you can make LEDs blink, change colors, and create a variety of stunning light displays.
How do you program LED strip lights with a remote?
Programming LED strip lights with a remote requires a compatible remote controller. The controller communicates with an IR receiver connected to the LED strip, which then carries out the pre-programmed instructions. However, this guide primarily focuses on programming LED strips using an Arduino board and does not cover remote programming.
How do you program an RGB LED?
Programming an RGB LED involves controlling the brightness of the red, green, and blue diodes individually to create any desired color. This is typically done using the Pulse-Width Modulation technique in conjunction with an Arduino or similar microcontroller and suitable software libraries such as FastLED.
How do you make a programmable LED?
Making a programmable LED involves using a microcontroller like an Arduino, a suitable power supply, connecting wires, and, of course, the LEDs themselves. Once these components are assembled and connected, you can use software tools like the Arduino IDE to write code that controls the LED’s behavior.
What types of programmable LED strips are there?
There are several types of programmable LED strips available. The most common are RGB and RGBW strips. RGB strips contain red, green, and blue LEDs, while RGBW strips include an additional white LED for more nuanced lighting effects.
What is the FastLED library?
FastLED is a powerful, open-source library for programmable LEDs, especially popular for its support for a wide range of LED chipsets and ease of use. It provides methods for color manipulation, brightness control, and other LED lighting effects.
What can I do with programmable LED strip lights?
The possibilities with programmable LED strip lights are nearly endless. You can create dazzling light displays, intricate color patterns, dynamic lighting effects, and much more. They can be used for mood lighting, decorative purposes, or even for more practical uses such as visibility and safety.
Can I control multiple LEDs at the same time?
Yes, you can control multiple LEDs simultaneously. By using loops in your code, you can easily change the color or brightness of many LEDs at the same time, allowing for intricate and complex lighting patterns.
What are some common issues when programming LED strips?
Some common issues when programming LED strips include incorrect wiring, insufficient power supply, and coding errors. However, most of these problems can be easily solved with careful troubleshooting and adherence to best practices.
What’s next after learning basic LED strip programming?
Once you’ve mastered the basics, there’s plenty more to learn! You can delve into more complex programming concepts, create more intricate lighting effects, and even integrate your LEDs with other technologies to create interactive light displays. The sky’s the limit when it comes to programmable LEDs!
Conclusion: Lighting Up Your World with LED Strip Programming
As we conclude our journey, it’s clear that programming LED strip lights offers an avenue for endless creativity, transforming ordinary spaces into vibrant, dynamic environments.
Reflecting on Your Programming Journey
Reflecting on this journey, you’ve learned the basics of LED strip lights, mastered programming tools, and begun creating stunning lighting effects. You’ve encountered challenges, but with each hurdle, you’ve developed resilience and broadened your skill set.
Looking Forward: What’s Next?
I’m really looking forward to the world of LED strip programming being yours to explore. As you continue to learn and experiment, each step will open up new possibilities, lighting up your world in ways you’ve never imagined. Whether integrating your setup with smart home technology or creating an LED masterpiece, the future is bright. So, keep illuminating, keep exploring, and keep creating.
Please свяжитесь с нами right away in case you need any help.
Обратные ссылки & Пинги
Ответить
Хотите присоединиться к обсуждению?Не стесняйтесь вносить свой вклад!
Добавить комментарий

В настоящее время Том является менеджером по продажам в Юнитоп (Китай) Ко, Лимитед. Он был в Светодиодное освещение промышленности с 2005 года. Он является экспертом в области продаж и маркетинга, а также управления производством. Он любит бодибилдинг, а также является безумным фанатом Apple! Он трудолюбивый парень и любит учиться и пробовать новое.
Электронная почта: tom@unitopledstrip.com WhatsApp: +86-18680307140


Hi, I would like to create a small LED light that shows three different colors. The colors will rotate for four seconds, seven seconds, and eight seconds. This rotation will happen four times from when the button is pressed.
Is this something you would be able to create?
Thank you,
Shea Kaltmann
We have contacted you by Email. Let’s further discuss then.