There’s nothing quite like the proper lighting to create the perfect ambiance in your space. One versatile option that has gained substantial popularity among the numerous lighting options is LED strip lights. Whether it’s about adding a vibrant touch to your home decor or illuminating a commercial display, LED strip lights provide a world of possibilities.
LED strip lights, also known as LED tape or ribbon, have become popular for several reasons. They’re flexible, energy-efficient, available in various colors and brightness levels, and customizable to fit specific lengths. This makes them an ideal solution for almost any lighting situation.
Allow me to introduce myself—I am Tom, your guide on this illuminating journey. My voyage into the world of LED lighting started in 2005, and since then, I’ve gained a wealth of knowledge and experience in LED technology. Over the years, I’ve immersed myself in every facet of LED lighting, from the intricate circuitry to the glow it radiates. My passion for LEDs has driven me to curate this comprehensive guide meticulously tailored to provide you with a clear roadmap for your DIY LED project.
With enthusiasm, patience, and the proper guidance, you can manipulate LED strip lights to illuminate your spaces in ways you’ve only dreamt of. So, let’s dive into this enlightening adventure, unmask the secrets of LED strip lights, and uncover their luminary potential. Ready? Let’s brighten up the world, one LED strip at a time!
This post will be your comprehensive guide to cutting, connecting, and powering LED strip lights. It will cover everything from understanding the basics of LED strip lights to the detailed process of measuring, cutting, and connecting them. Also, we will delve into the considerations for powering your LED strip lights, the necessary safety precautions, and some common troubleshooting tips.
LED 스트립 조명 이해
To kick off your project, it’s essential to understand what LED strip lights are and their diverse types and uses.
The Basics of LED Strip Lights
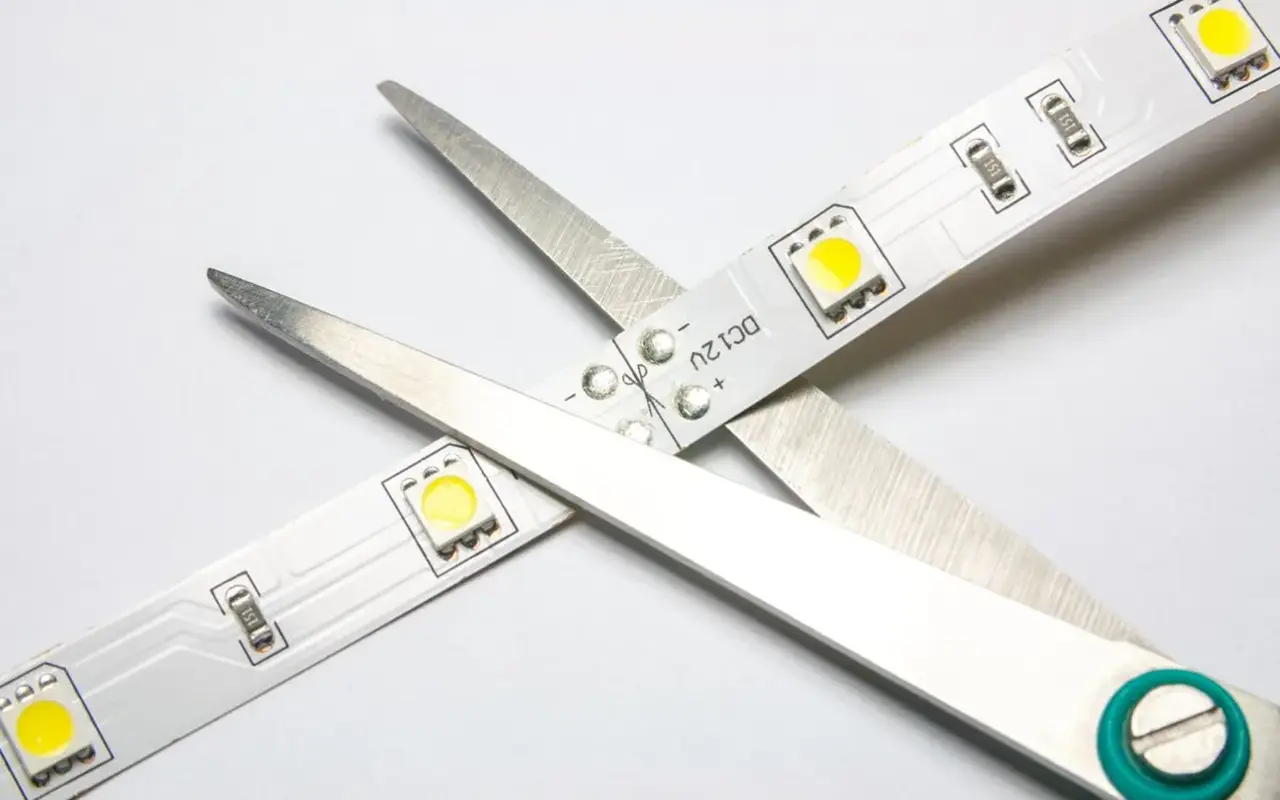
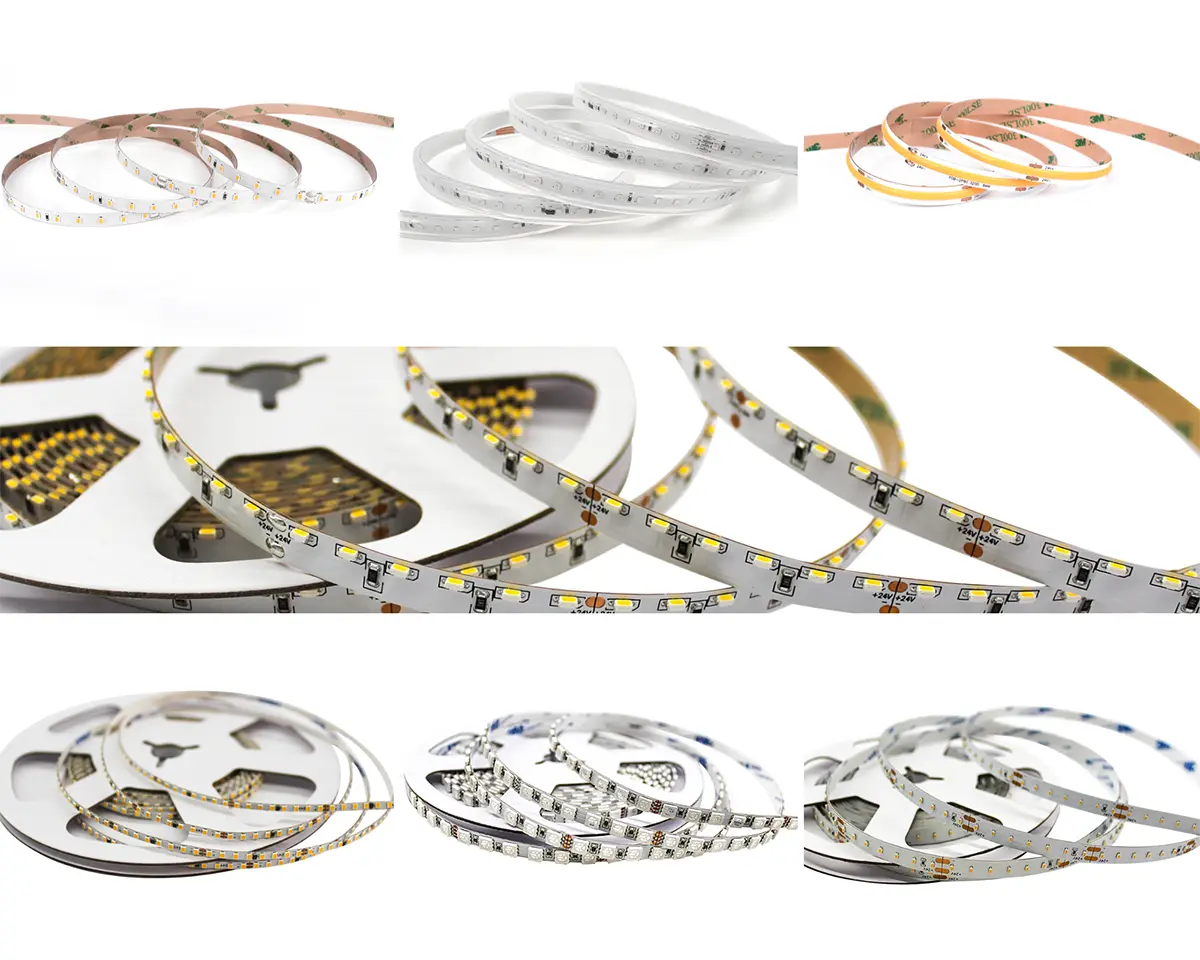
At their core, LED strip lights are a flexible circuit board populated with LED lights and encased in a protective coating. They typically come in reels; a dashed line or scissor icon indicates the cutting points.
Different Types and Uses of LED Strip Lights
LED strip lights come in various types, each with unique features suited to different applications. They can be utilized for task lighting, accent lighting, or even as an aesthetic addition to your gaming rig or home theater. You can easily tailor these strips to your specific needs with the correct tools and instructions.
Preparing for the Project: Tools and Materials
Embarking on a DIY LED strip light project isn’t just about wielding a pair of scissors and making the cut. It requires careful preparation, a discerning choice of tools and materials, and an understanding the procedure.
List of Required Tools
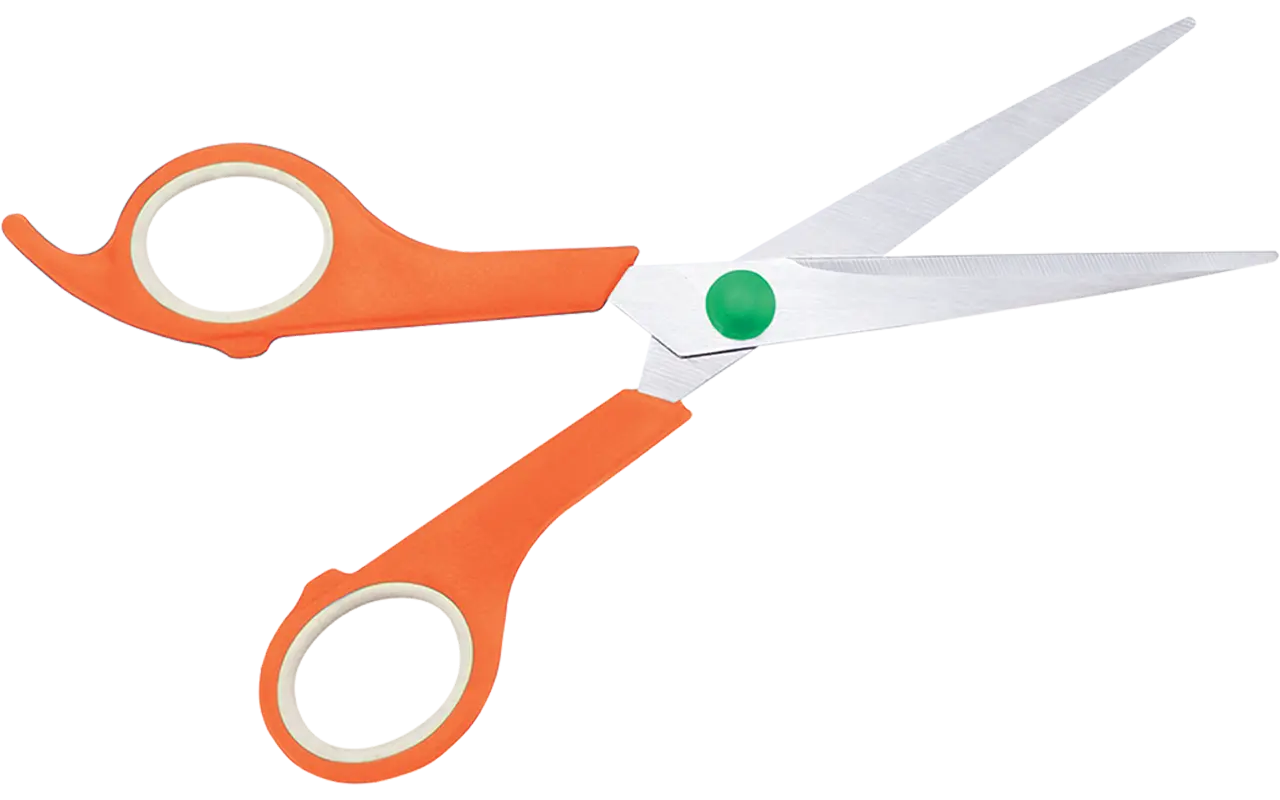
You need a set of essential tools to accomplish this lighting task with finesse. These include a sharp pair of scissors or a precision utility knife for a clean cut and a ruler or measuring tape to get accurate strip lengths. If you plan to connect multiple strips, a quality soldering iron becomes a critical addition to your toolkit. Also, consider safety gloves to protect your hands during cutting and soldering.
Choosing Quality Materials
The materials you select for this project play a significant role in the success of your LED lighting endeavor. Opting for high-quality LED strip lights that offer consistent brightness, energy efficiency, and longevity is crucial. While seemingly cost-effective, lower-grade lights may compromise your project due to their inferior brightness, limited lifespan, and challenging cutting precision. Investing in high-quality LED strips that promise durability, a better aesthetic appeal, and ease of installation is advisable.
How to Choose the Right LED Strip Lights
Choosing the appropriate LED strip lights might seem daunting with the vast array of options available. However, understanding your project’s unique requirements can help streamline the selection process.
Factors to Consider
When choosing your LED strip lights, several factors come into play. The primary considerations are the desired light color, brightness level, and strip length. You might want a warm, cozy glow for a living room or a cool, bright light for a workspace. The strip length depends on the area you wish to illuminate. Furthermore, it is important to verify whether the LED strip lights are designed to be cut and reconnected if your project requires it. Some LED strip lights have pre-marked cutting points that make the process easier.
Reliable Sources for LED Strip Lights
The market is saturated with numerous online and physical retailers selling LED strip lights. Choosing a trustworthy source that provides high-quality products and supplies detailed cutting and installation instructions is crucial. Reviews and recommendations can serve as a good starting point. Whether you’re purchasing from an online giant like Amazon or a specialized lighting store, thorough research, and careful selection will pave the way for a successful LED lighting project. If you would like to buy in bulk qty from China, 유니탑 can be one of the best choice.
The Cutting Process: LED Strip Lights
Embarking on the cutting process of your LED strip lights can be an exhilarating part of your DIY project. Once you’ve secured your LED strip lights and gathered the requisite tools, you can wield your scissors or utility knife and make precise cuts.
Where to Cut LED Strip Lights
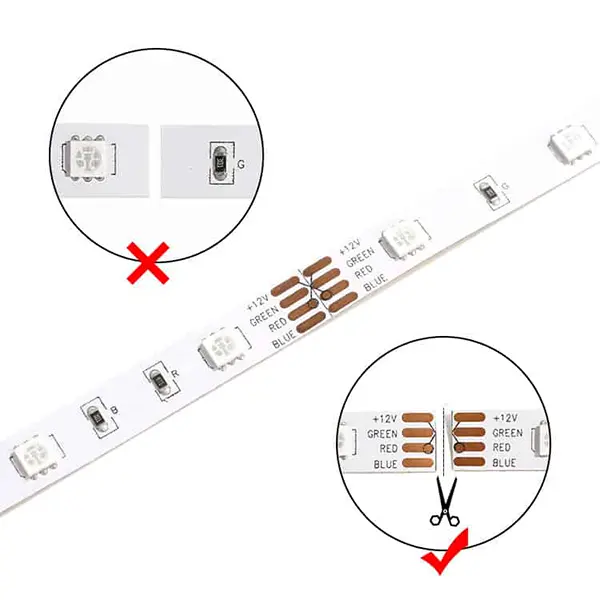
To maintain the functionality and integrity of your LED strip lights, it’s crucial to know where to make the cuts. LED strip lights are typically designed with specific intervals—usually every 2 to 5 cm, marked by a distinctive dashed line or a scissor icon—where they can be safely cut without damaging the components.
Detailed Guide on How to Cut LED Strip
Mastering the cutting process requires a few strategic steps that assure the integrity of your LED strip lights while achieving the desired length.
Measuring the Length
The first step involves careful measurement. Using a ruler or measuring tape, accurately gauge the length of the LED strip you need for your project. Once you’ve determined the correct length, mark the LED strip clearly.
Locating the Scissors Logo
Before making any cuts, finding the designated cutting point on the LED strip is paramount. This is typically signified by a scissor icon or a dashed line, often surrounded by copper solder pads. Cutting on these indicated marks ensures you don’t damage the internal circuitry of the LED strip light.
The Cutting Technique
You’re ready to cut with your LED strip accurately measured and the correct cutting point identified. Make a confident, steady cut along the marked line using a sharp pair of scissors or a utility knife. It’s important to apply even pressure to create a clean, smooth cut that allows for seamless connections or end-capping later.
Connect LED Strip Lights
Once you’ve mastered cutting your LED strip lights, the next phase of your DIY journey may involve connecting multiple strips. This step often comes into play in more expansive projects that demand longer light installations than a single LED strip light reel can provide.
When and Why Connect Multiple Strips
The need to connect multiple LED strip lights arises in various circumstances, especially in larger projects. Whether it’s to illuminate an entire room or a long hallway or create a dramatic effect in your outdoor space, connecting multiple strips can help achieve the required length and the overall lighting effect you envision.
Guide to Clipping and Soldering LED Strips
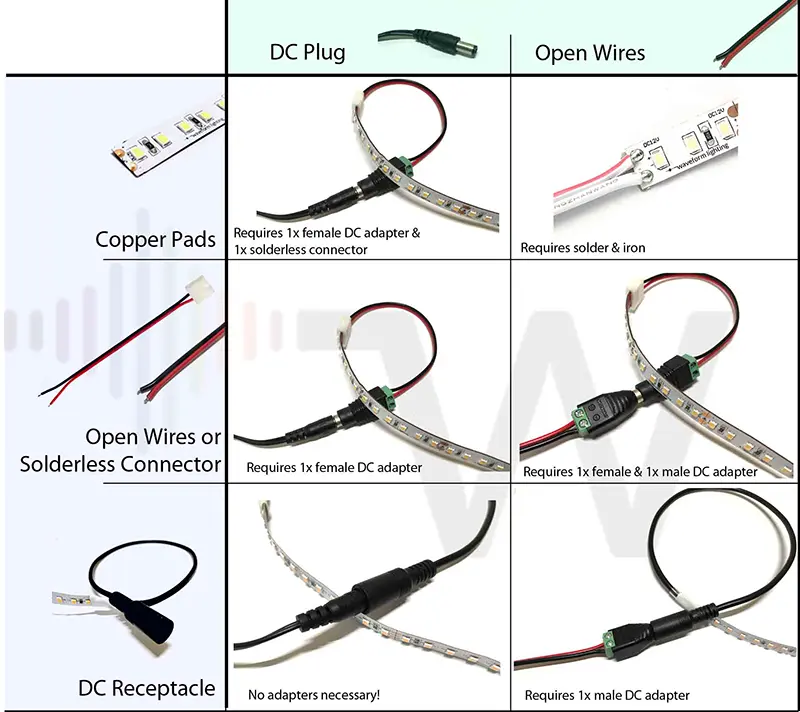
Connecting your cut LED strip lights can be accomplished by either clipping or soldering, depending on the design of your LED strips. However, not all LED strips can be soldered, so it’s crucial to consult the manufacturer’s instructions or product specifications before proceeding.
Overview of LED Strip Connectors
LED strip connectors offer a versatile solution for joining multiple LED strips. They come in various shapes and sizes, designed to accommodate different types of LED strip lights. These handy components are integral for a seamless, safe, and efficient connection process.
Choosing the Right Connector
When it comes to selecting a suitable connector, several factors come into play. Key among these is your LED strip light’s width and pin count. Choosing a connector that aligns perfectly with these parameters is important to ensure a secure and reliable connection.
Detailed Guide on Connecting LED Strips
Whether you use a clip-on connector or sell the LED strips together, it’s vital to ensure a solid connection. A secure connection guarantees uninterrupted lighting and prevents potential power issues and flickering. By carefully following these steps, you can achieve a seamless lighting array that perfectly suits your project.
Powering Your LED Strip Lights: Series or Parallel?
Powering your LED strip lights involves more than just plugging them into an outlet. It requires a thorough understanding of their power needs, the intricacies of series and parallel configurations, and the power supplies best suited for your specific LED strip lights.
Understanding Power Requirements
Before you power up your LED strip lights, it’s crucial to comprehend their specific voltage requirements. The correct voltage is paramount to properly functioning your LED strip lights. It’s typically indicated on the product or in the manufacturer’s specifications and is catered to by a designated power supply.
Selecting the Appropriate Power Supply
Choosing the correct power supply for your LED strip lights is essential. This decision depends on two main factors: the power requirements of your LED strip light and the total length of the LED strip that needs powering. Misalignment between the power supply and the LED strip light can lead to sub-optimal lighting or even damage to the strip.
Guide to Connecting LED Strip Lights to Power: Step-by-Step
When it comes to connecting your LED strip lights to a power source, caution and precision are vital. Always adhere strictly to the manufacturer’s instructions. D disconnect the power source before you make any electrical connections for your safety. This ensures that you secure a safe working environment and protect your LED strip lights from potential electrical damage. This process may seem intricate at first glance, but with careful preparation and the proper guidance, you can illuminate your space just as you envisioned.
Safety Precautions for DIY LED Projects
Embarking on a DIY project with LED strip lights is an exciting endeavor, but it also necessitates a certain degree of safety awareness. The cutting, connecting, and powering of LED strip lights are processes that, if not conducted cautiously, could pose safety risks.
Safety Tips for Cutting, Connecting, and Powering LED Strip Lights
Safety should always be a top priority when handling LED strip lights. Before starting, ensure the LED strip lights are entirely disconnected from the power source to circumvent any electrical hazards. Moreover, use tools with precision to avoid accidental slips that could lead to injury or damage to your LED strips. Wear protective gear, gloves, and safety goggles, especially while cutting or soldering. These precautions not only guarantee your safety but also protect the integrity of your LED strip lights.
Troubleshooting Common LED Strip Light Issues
Even when you meticulously follow instructions and use the right tools, you might still encounter some common LED strip light issues. However, these challenges should be manageable; understanding how to troubleshoot effectively can get your project back on track.
Common Problems and Solutions
Issues you might face range from uneven cuts and frayed edges to damaged LED lights and malfunctioning circuitry. These problems often arise due to incorrect cutting techniques, misuse of tools, or neglecting the manufacturer’s instructions. You can rectify these issues and perfect your installation process by referring back to the manufacturer’s guidelines and ensuring the correct usage of appropriate tools.
When to Seek Professional Help
If your LED strip lights persistently malfunction despite your troubleshooting efforts, it might be time to consult a professional. Don’t hesitate to seek professional advice or services when necessary, as they could prevent further damage and ensure your LED strip lights shine their brightest.
Customizing LED Strips: Installation Techniques
Now that you’ve acquired the know-how to cut and connect your LED strip lights, it’s time to move on to the exciting installation phase. From the basic stick-on method to advanced mounting, several installation techniques suit your unique project requirements.
How to Install LED Strip Lights
LED strip light installation may seem as straightforward as stripping off the adhesive backing and affixing the strip to a surface. However, it can sometimes be complicated. Consider additional mounting hardware, such as clips or brackets, depending on your project’s complexity and the strip’s intended longevity. These ensure a secure and stable installation, preventing your LED strips from loosening over time.
Cutting and Soldering Services for Custom Length LED Strips
Perhaps the idea of cutting and soldering LED strip lights still seems daunting, or you prefer a professionally finished product. You’re lucky, as numerous companies offer custom cutting and soldering services. They will tailor the LED strip length to your exact specifications and add lead wires or connectors, thus providing a ready-to-install product tailored to your project.
Unleashing Creativity with LED Strip Lights
LED strip lights aren’t just functional; they’re a powerful tool for illuminating your creativity. With these lights, the potential for creating personalized and distinctive lighting effects is virtually limitless.
Inspiring Ideas for LED Strip Light Placement
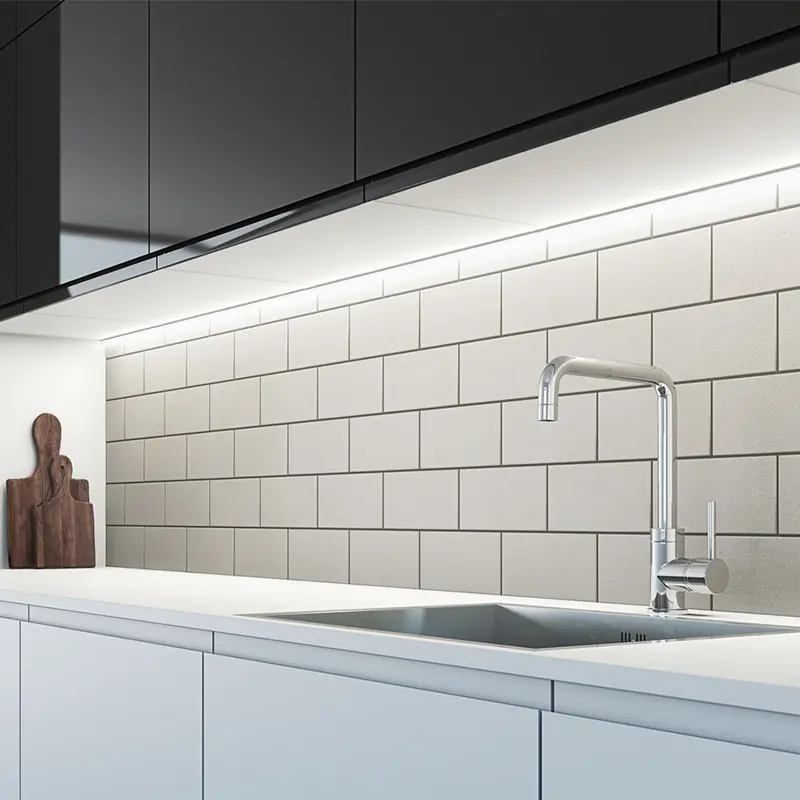
From practical to decorative, LED strip lights can breathe life into various parts of your home or workspace. Try installing them under cabinets for enhanced visibility, behind your TV for a cozy movie-night ambiance, under beds for a cool futuristic effect, or along staircases for added safety and style. You can even frame mirrors with LED strip lights, adding a touch of Hollywood glamour to your vanity. These are just a handful of ideas, but with some imagination, you’ll find countless ways to transform your space with LED strip lights. You can find click here to find the best LED strip light ideas.
자주 묻는 질문(FAQ)
This section addresses some common questions related to cutting, connecting, and powering LED strip lights.
Can I cut LED strip lights?
Yes, you can cut LED strip lights, but only at designated cutting points, usually marked by a dashed line or a scissor icon.
Where should I cut my LED strip lights?
Cutting your LED strip lights at the marked points is crucial to ensure the remaining sections function correctly. A dashed line or a scissor icon typically indicates these points.
Are all LED strip lights cuttable?
Most LED strip lights can be cut, but always refer to the manufacturer’s instructions to ensure you don’t damage the strip.
How do I connect multiple LED strip lights?
Connecting multiple LED strips may require a soldering iron or special connectors designed for your specific type of LED strip lights. Always check with the manufacturer’s instructions to choose the proper method.
Can I connect LED strip lights without soldering?
Yes, some LED strip lights can be connected using clip-on connectors, eliminating the need for soldering. Always refer to the manufacturer’s instructions before proceeding.
How do I power my LED strip lights?
LED strip lights typically require a dedicated power supply. The type of power supply depends on the total length of the LED strip that needs to be powered and its specific power requirements.
How do I connect my LED strip lights to a power supply?
Connecting LED strip lights to a power supply usually involves attaching a power connector to the strip end. Make sure to disconnect the power source before making any electrical connections.
What safety precautions should I take when handling LED strip lights?
Always disconnect the LED strip lights from the power source before cutting. Wear protective gear, such as gloves and safety goggles, when handling sharp tools to prevent injuries.
What should I do if my LED strip lights aren’t working after cutting and connecting?
If you encounter problems, check your cutting and connection points to ensure accuracy. If problems persist, it may be best to seek professional help.
How can I install my LED strip lights for a unique look?
LED strip lights can be installed under cabinets, behind televisions, under beds, along staircases, and around mirrors for dramatic effects. The possibilities are limited only by your creativity!
Conclusion: Your Journey with LED Strip Lights
Navigating the world of LED strip lights can seem complex, but with the proper knowledge and tools, anyone can achieve fantastic lighting effects in their homes, businesses, or DIY projects. As we’ve illuminated in this guide, handling LED strip lights, from cutting to connecting and powering, is an art that requires attention to detail and an understanding of the unique characteristics of these versatile lighting solutions.
We hope this comprehensive guide has helped shed light on the intricacies of LED strip lighting. If you have further queries or require specific lighting solutions tailored to your needs, remember that expert advice is only a click away.
Unitop, a pioneer in the LED industry and one of China’s leading manufacturers of LED 스트립 조명 그리고 LED 네온 플렉스, is here to illuminate your path. Our expert team thrives on providing you with quality products and the professional advice needed to make your lighting visions a reality. Your LED project deserves the best – the Unitop’s best. Don’t hesitate to 문의하기 for all your LED lighting needs, and let’s create bright and vibrant spaces together.

Tom은 현재 다음의 영업 관리자입니다. 유니탑(중국) 유한공사. 그는 LED 조명 업계에서 2005년부터 근무하고 있습니다. 그는 영업 및 마케팅, 공장 관리 분야의 전문가입니다. 보디빌딩을 좋아하고 애플의 열렬한 팬이기도 합니다! 그는 열심히 일하는 사람이며 새로운 것을 배우고 시도하는 것을 좋아합니다.
이메일: tom@unitopledstrip.com WhatsApp: +86-18680307140


댓글을 남겨주세요
토론에 참여하고 싶으신가요?자유롭게 기여해 주세요!