Are you trying to figure out how to keep your LED strip lights glowing? Whether you’re questioning whether they need constant plugging or periodic charging, rest assured you’ve come to the right place. Let’s illuminate the facts about LED strip lights, dispelling myths and shedding light on the best ways to power them for optimal performance.
LED strip lights are powered directly from mains electricity or alternative sources like batteries and solar panels, eliminating the need for charging. They provide continuous illumination without the hassle of frequent recharging.
Continue exploring with us as we unpack various power solutions for LED strip lights, from straightforward plug-ins to innovative battery and solar options. Discover how to enhance the efficiency and aesthetics of your lighting setup, ensuring your spaces shine brilliantly. Whether it’s adding a cozy ambiance to your living room or a vibrant flair to your business, mastering these insights will transform your approach to lighting.
Understanding Power Requirements for LED Strip Lights
LED strip lights are an increasingly popular choice for home and commercial lighting due to their efficiency and versatility. Unlike many modern gadgets that require frequent charging, LED strip lights are designed for continuous operation through a direct power connection. This eliminates the need for charging but raises important considerations about how they are powered to ensure optimal performance and safety.
Power Adapters and Converters
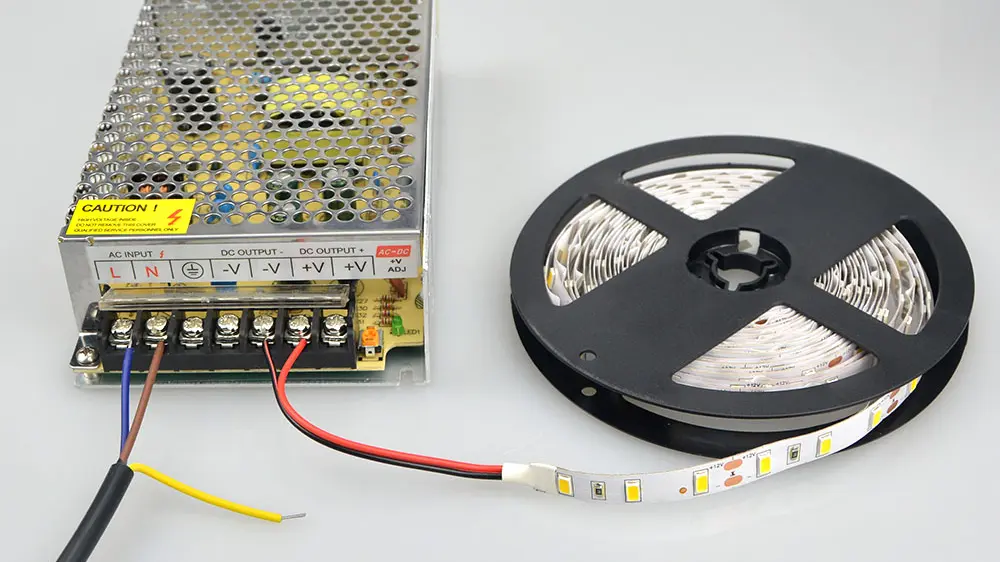
Most LED strip lights operate on low voltage, typically 12V or 24V DC, which makes the role of power adapters and converters crucial. These devices convert high-voltage AC from your mains electricity supply to a safer low-voltage DC output that LED strips can handle.
Choosing the Right Adapter:
Compatibility: It’s essential to match the power adapter’s output voltage exactly with your LED strip’s requirements. An incompatible adapter can cause inefficient lighting, potential damage, or hazards.
Capacity: The power adapter must also support the total wattage demanded by your strip lights. A good practice is to select an adapter that offers a wattage capacity 20% above what your setup requires, providing a buffer to handle occasional peaks in demand without overheating.
Voltage and Current Requirements
Correctly understanding and managing your LED strips’ voltage and current needs will help maintain their brightness and longevity.
Key Factors to Consider:
Voltage Drop: In longer runs of LED strips, the voltage can decrease as the distance from the power source increases, which might result in dimming lights towards the end of the strip. To prevent this, consider using a higher voltage setup or installing multiple power feeds along the length of the strip.
Amperage: The amperage or current draw should be, at most, what your wiring and power source can safely supply. Overdrawing current can lead to overheating and potential fire risks, especially in larger, more complex installations.
Safety First
When installing and operating LED strip lights, prioritizing safety is paramount. Here’s how to ensure a safe setup:
Dedicated Circuits: Connect your LED strips to a dedicated electrical circuit whenever possible to avoid overloading your home or building’s electrical system.
Proper Insulation: All connections and wiring should be properly insulated to prevent any chance of short circuits. This is particularly crucial in environments where moisture or physical damage to wiring might occur.
Certifications: Always opt for LED strips and associated hardware that have passed rigorous safety standards and carry the appropriate certifications. This is your assurance that the products are safe for long-term use.
Installation Best Practices for LED Strip Lights
Ensuring a flawless setup of LED strip lights not only enhances the aesthetic appeal of your space but also contributes to the longevity and functionality of the lights. Below are detailed guidelines to achieve professional-grade installation results, specifically addressing the needs of those wondering about the power needs and whether these lights need charging.
Installation Guidelines: A Step-by-Step Approach
The process of installing LED strip lights, while straightforward, requires attention to detail to ensure the best outcomes. Here’s how to approach the installation to ensure your lights perform optimally without frequent charging.
Preparation:
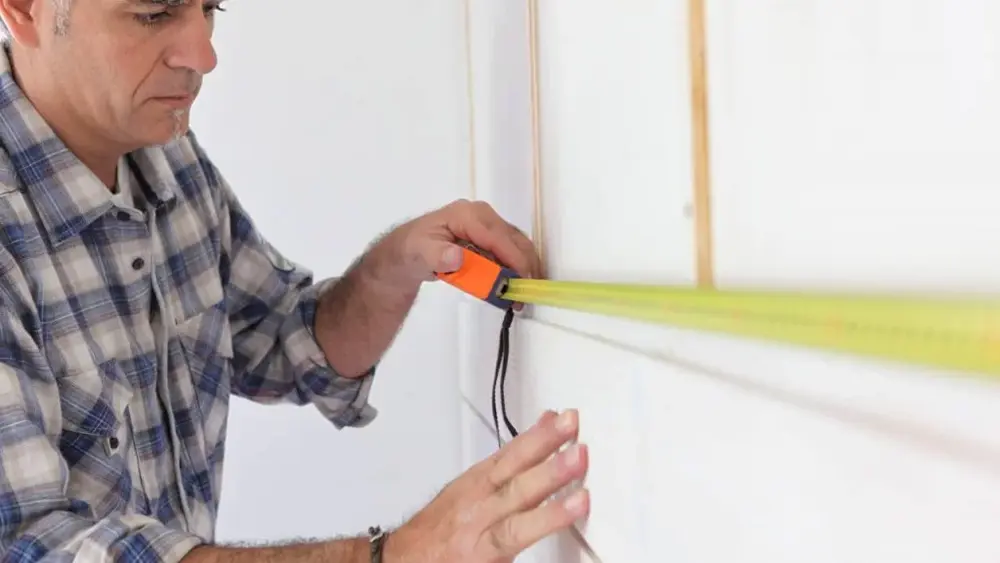
Measure Accurately: Before purchasing, measure the length of the area where you intend to install the lights. Consider any corners or cuts you must make, as LED strips typically can only be cut at designated points.
Gather Materials: Ensure you have all the necessary materials before starting. This includes the LED strip lights, power supply, connectors, mounting clips, and specific tools the manufacturer recommends.
Installation Process:
表面処理: Clean the surface where the strips will be mounted. LED strips adhere best to clean, dry, and smooth surfaces. Use a mild cleaning solution to remove dust and grease and allow the surface to dry completely.
Test Before Installation: Connect the LED strips to the power supply and test all segments to ensure they work properly before final installation. This step helps identify any defective sections or connection issues.
Secure Installation: Peel the adhesive backing and stick the LED strip carefully along the desired path. Press firmly along the strip to ensure strong adhesion. For added security, especially in areas of movement or humidity, consider using mounting clips to secure the strips.
Choosing Installation Sites: Tips for Selecting the Best Locations and Surfaces
The choice of installation sites significantly affects the impact and efficiency of LED strip lights. Here’s how to select the best locations:
Under Cabinet Lighting: For kitchen applications, installing LED strips under cabinets provides excellent task lighting. Ensure the strip is hidden from direct sight for a seamless look.
Accent Lighting: Use LED strips to highlight architectural features or artwork. Install them in recessed coves or behind objects to create a backlight or halo effect.
Outdoor Lighting: When installing LED strips outdoors, choose products rated for outdoor use. Ensure they have appropriate IP ratings to withstand moisture and dust.
Power Supply Management: How to Maintain a Stable Power Supply and Avoid Common Errors
Effective power supply management is crucial for preventing voltage drops and ensuring consistent brightness, especially since LED strip lights are not charged but powered continuously.
Calculate Total Load: Determine the total wattage your LED strip installation will require and ensure your power supply can handle this load. Consider splitting the load between multiple power supplies for extensive installations.
Avoid Daisy Chaining: Instead of connecting multiple strips end-to-end, connect them back to a central power source. This configuration helps maintain consistent voltage and brightness across all strips.
Check Connections: Regularly inspect all connectors and junctions for loose connections, which can lead to voltage drops and flickering lights. Ensure all connections are tight and secure using appropriate connectors and soldering where necessary.
Troubleshooting Common Power Issues with LED Strip Lights
Even with meticulous installation, you might encounter some issues that affect the performance of your LED strip lights. Understanding how to troubleshoot these common problems ensures your LED installations maintain luminosity and functionality over time.
Flickering Lights: Steps to Diagnose and Fix Flickering Issues in Your LED Strip Lights
Flickering in LED strip lights can be more than just annoying—it may also reduce the lifespan of the LEDs. Here’s a detailed approach to effectively address this common issue:
Check the Power Supply: Often, a flickering issue arises from an insufficient or unstable power supply. Verify that the power supply’s wattage meets or exceeds the total wattage your LED strip lights need. If you find the supply lacking, upgrading to a higher-wattage power supply might be necessary.
Inspect Connections: Another frequent cause of flickering is loose or poor connections. Examine all connections between your LED strip segments and at the power source and controller. Tighten any loose connections and replace worn-out connectors to ensure optimal performance.
Dimmer Compatibility: If your setup includes a dimmer, ensure it is compatible with LED technology. Many dimmers designed for incandescent bulbs do not perform well with LEDs, leading to flickering. Upgrading to an LED-compatible dimmer often resolves this issue effectively.
Secure Connections: How to Ensure All Connections Are Secure and Functional
Secure and reliable connections are fundamental for the smooth operation of your LED strip lights. Here are key strategies to ensure connection integrity:
Use High-Quality Connectors: Always opt for high-quality, reliable connectors that snugly fit your LED strips. Poor-quality connectors may loosen over time and lead to operational issues.
Soldering for a Permanent Solution: Consider soldering the connections in setups where the configuration is permanent or unlikely to need adjustments. This method provides a more stable and durable connection than clip-on connectors. It is recommended for areas exposed to movement or environmental variables.
Regular Maintenance Checks: Routine checks are crucial, especially in setups exposed to vibrations or frequent handling. Periodically inspect all connections as part of your maintenance routine to avoid unexpected failures or issues.
Voltage Drops: Managing These Drops to Prevent Loss of Brightness in Longer Installations
Voltage drops in LED strip installations can lead to uneven lighting, with noticeable dimming at the end of the strip. Here are some strategies to manage this issue effectively:
Use a Higher Voltage: Consider using 24V LED strips instead of the more common 12V. Higher voltage strips are better equipped to handle long distances without significant voltage drops.
Multiple Power Feeds: Instead of running a single long strip, divide your installation into shorter segments. Power each segment independently from both ends or a central point to ensure an even power distribution and minimize voltage drops.
Thicker Wiring: Employ thicker gauge wires for your connections, particularly over longer distances. Thicker wires offer lower resistance, which helps in maintaining consistent voltage levels across the installation.
Enhancing the Lifespan and Efficiency of LED Strip Lights
Maximizing the lifespan and efficiency of LED strip lights hinges on effective maintenance and selecting quality components. By implementing key best practices, you can ensure your LED installations are more energy-efficient and last longer.
Energy-Efficiency: Best Practices
Effective energy management is crucial for LED strip lights to ensure they are both cost-effective and environmentally friendly:
High-Efficacy LEDs: Opt for LEDs with higher luminous efficacy, which provide more brightness for less power, making them energy-efficient. This choice helps reduce electricity consumption while maintaining optimal light output.
PWM調光: To dim your LED strips, implement pulse-width modulation (PWM). This technology allows you to adjust the brightness of your lights without significantly decreasing energy efficiency. PWM dimming reduces power usage when full brightness is not necessary and extends the life of the LEDs by reducing thermal stress.
Efficient Power Supplies: Select power supplies that match your LED strip setup’s voltage and current requirements. A power supply with a higher efficiency rating not only conserves energy but also decreases the heat generated during operation, which can enhance the overall lifespan of the LED strips.
Routine Maintenance
Maintaining your LED strips ensures they continue to operate at peak efficiency and prevents premature failure:
Regular Cleaning: Dust and residue can accumulate on the surface of LED strips, impeding light output and increasing the likelihood of overheating. Regularly cleaning your LED strips with a soft, dry cloth can prevent this buildup and maintain the brightness and efficiency of the lights.
熱レベルを監視する: LEDは過度の熱による損傷を受けやすい。LEDが過熱していないか、定期的に点検してください。ストリップ周辺の換気を良くしたり、ヒートシンクを取り付けたりすることで、より効果的に熱を放散させることができ、LEDの完全性を保つことができます。
配線を点検する: 配線は時間の経過とともにほつれたり露出したりすることがあり、短絡やその他の電気的問題を引き起こす危険性があります。定期的に点検することで、深刻な問題に発展する前に配線の問題を特定し、対処することができます。LED照明の安全性と機能性を維持するために、損傷した配線は速やかに修理または交換してください。
高品質の製品を選ぶ
高品質のLED製品に投資することは、長期的な満足とパフォーマンスのために不可欠である:
研究とレビュー 購入する前に、さまざまなLEDブランドや製品を調べよう。信頼性と性能について好意的な評価を得ている商品を探しましょう。評判の良いブランドは、品質と耐久性の約束を守ることが多い。
技術仕様: LEDストリップを選択する際には、演色評価数(CRI)、色温度、IP定格などの技術的側面を考慮してください。CRIが高いほど色の精度が高くなり、自然な色の再現が不可欠な用途では極めて重要です。適切な色温度とIP定格は、LEDが意図された環境において優れた性能を発揮することを保証します。
保証とサポート: 常に、しっかりとした保証と信頼できるカスタマーサポートのある製品を選びましょう。これらの要素は、メーカーの製品に対する自信と顧客満足へのコミットメントを示すものです。
LEDストリップライトの電力代替とイノベーションを探る
LED照明の状況は急速に進化しており、照明アプリケーションやシステムの電源供給方法が改善されている。LEDストリップライト用電源の革新により、これらのシステムはより柔軟で環境に優しく、ユーザーのニーズの変化に適応できるようになりました。
代替電源オプション:バッテリーから太陽光発電まで-従来の電源がなくても照明を点灯し続けるオプション
従来のLEDストリップライトは、一般的に家庭用電気への直接接続に依存していた。しかし、代替電源はその展開と使用の可能性を広げ、モバイルと定置の両方の用途でその魅力を高めている。
バッテリー駆動LEDストリップ:
機動性と柔軟性:バッテリー駆動のLEDストリップは、電源コンセントへのアクセスが容易でない場所での設置に大きなメリットをもたらします。イベント、屋外スペース、車両などでの一時的な設置に便利で、LED照明の利用方法と利用場所にかなりの柔軟性をもたらします。
バッテリーの種類バッテリーの選択は非常に重要で、必要な寿命や照明の強さによって大きく異なります。小型で短期間の照明に適した標準的な単三電池から、より長時間の使用に耐えうる高度なリチウムイオンパックまで、さまざまな選択肢があります。各バッテリーには、コスト、エネルギー密度、再充電可能性などの利点があり、ユーザーは特定のプロジェクト要件に合わせて照明ソリューションをカスタマイズすることができます。
ソーラーLEDストリップ:
環境に優しい照明: 持続可能性が世界的に重要視される中、屋外照明ではソーラーLEDストリップの人気が高まっている。これらのシステムは、日中の太陽エネルギーを利用して日没後に照明に電力を供給し、従来のエネルギー源に関連する二酸化炭素排出量を大幅に削減します。
設置に関する考慮事項: 太陽光発電LEDストリップの導入を成功させるには、慎重な計画が必要です。システムには通常、ソーラーパネル、チャージコントローラー、バッテリー、LEDストリップが含まれる。バッテリーを一日中効率的に充電するには、最適な太陽光照射が必要なため、ソーラーパネルを正しく設置することが重要です。
スマート・テクノロジー:テクノロジーの進化により、よりスマートで効率的な照明ソリューションが実現
スマート技術を統合することで、LEDストリップ照明の応答性が向上し、制御が容易になる。
コネクティビティとコントロール:
ワイヤレスコントロール: ブルートゥースやWi-Fiなどの進化により、LEDストリップはスマートフォンや音声アシスタントを使って遠隔操作できるようになった。この技術により、物理的な操作なしに照明の調整が可能になり、利便性と高度なカスタマイズ性の両方が提供される。
ホームオートメーションシステムとの統合: LEDストリップはまた、包括的なホームオートメーションシステムに統合することができ、時間帯や空間内の活動の検出に基づいて照明が自動的に調整される高度なシナリオを可能にします。
カスタマイズの強化:
調整可能な設定: 最新のLEDコントローラーには、調光や色温度、色相を調整する機能が備わっている。この機能により、ユーザーは部屋のムードを正確に設定し、さまざまな活動や時間帯に照明を適応させることができます。
プログラミングとスケジューリング: これらのスマートLEDストリップは、特定のパターンを表示したり、スケジュールに従って変化するようにプログラムすることができる。この機能は、照明が機能的かつ審美的な役割を果たし、ブランディングや顧客体験に貢献する商業環境で便利です。
LEDストリップライトの各種電源への接続
LEDストリップライトの機能性と安全性を確保するには、さまざまな電源オプションを理解することが不可欠です。ホームプロジェクトでも商業スペースでも、最適な電源に適切に接続することで、効率と耐久性が向上します。
電源オプション:ニーズに合ったオプションの選択
LEDストリップライトは、その汎用性の高さで知られていますが、その理由のひとつは、利用できる電源の多様性にあります。適切な電源オプションを選択することは、設置場所の具体的なニーズにとって極めて重要です:
壁コンセント(標準AC電源): これは最も簡単な方法で、LEDストリップには家庭用ACコンセントに直接差し込める電源アダプターが付属している。コンセントに簡単にアクセスできる屋内環境では、特に信頼性が高い。
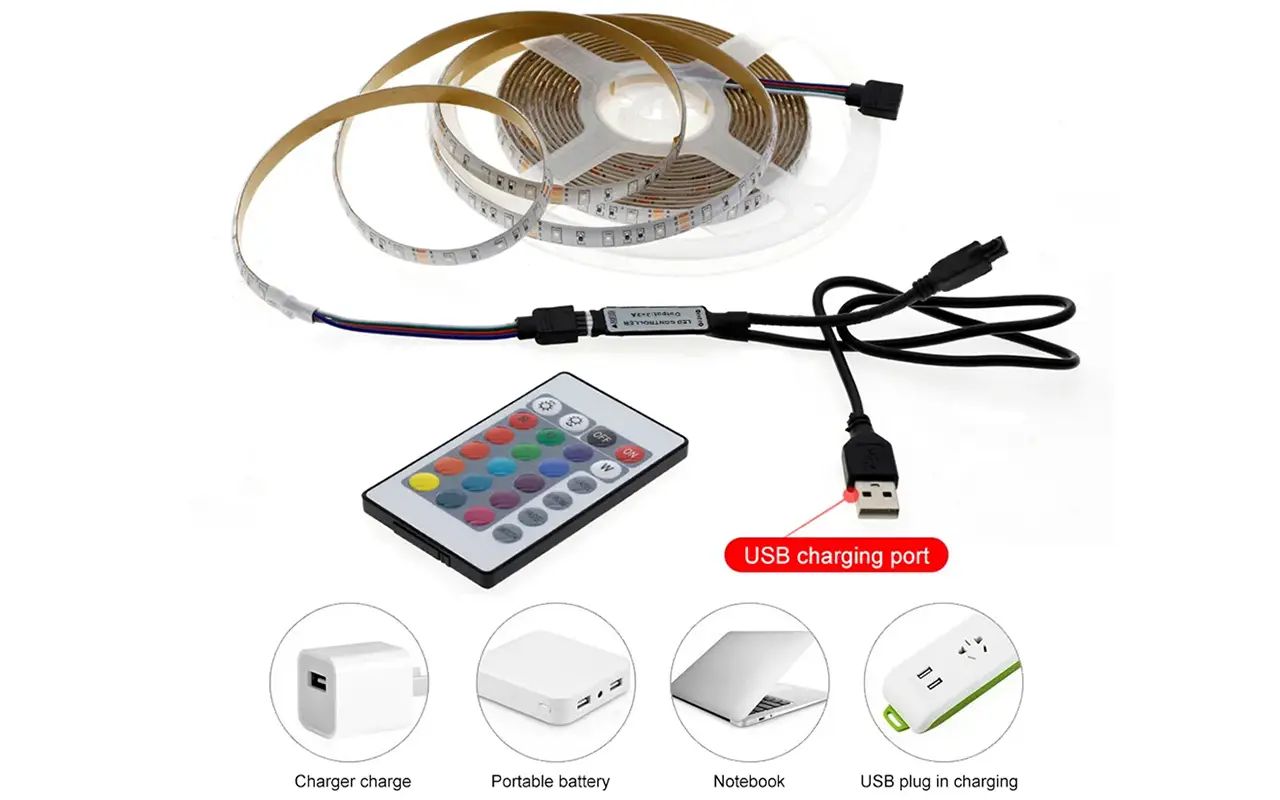
USB電源:
携帯性:小型のポータブルプロジェクトや一時的なセットアップに最適なUSB給電LEDストリップは、コンピューター、パワーバンク、壁面アダプターなど、USBポートを備えたあらゆる機器に接続できます。
電力制限:USBポートは通常、電力出力が低いため、標準的なウォールアダプターを使用した場合と比較して、LEDストリップの長さや明るさが制限される可能性があることに注意することが重要です。
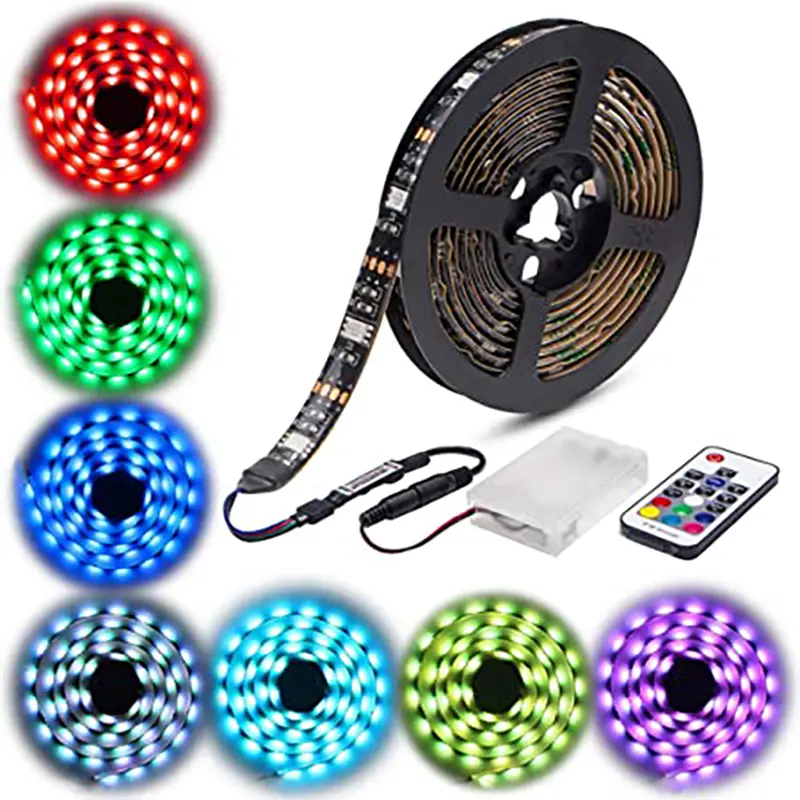
バッテリー駆動:
機動性:機動性に優れたバッテリー式LEDストリップは、屋外や移動式など、近くにコンセントがない場所での設置に最適です。
バッテリーの種類電池の種類は、短期間または使用頻度の低い標準的な使い捨て電池から、必要な寿命や明るさに応じて、長期的または常設用の充電式電池パックまで、幅広く選択できます。
接続の手順LEDストリップライトを安全かつ効果的に接続するための実践的手順
適切な接続方法に従わなければならない:
ストリップの準備: LEDストリップにあらかじめ接着剤が塗布されており、電圧や接続タイプに関して選択した電源と互換性があることを確認してください。
コネクションを作る
ダイレクト・コネクション: 付属のアダプターまたはコントローラーを壁コンセントやUSB電源のストリップに使用し、接触が緩まないようにすべての接続がしっかりと行われていることを確認してください。
バッテリーの接続: バッテリー電源を使用する場合は、LEDストリップを適切なバッテリーパックに接続し、極性(プラスとマイナス)を正しく合わせてください。
設置前のテスト: ストリップを恒久的に取り付ける前に、すべてのコンポーネントを接続してテストし、すべてが正しく点灯し、ちらつきがないことを確認してください。
安全上のご注意安全な設置および操作のための重要な措置
LEDストリップライトの設置や操作には、安全性が最も重要です。ここでは、安全なセットアップを確実にするための主な注意事項を説明します:
損傷がないか点検すること: 取り付けの前に、すべての部品に損傷がないか慎重に確認してください。損傷した部品を使用すると、短絡や火災の原因になることがあります。
過負荷を防ぐ: 過熱や火災の危険を避けるため、総電力需要が配線や電源の容量を超えないようにしてください。
Proper Insulation: 熱収縮チューブまたは電気テープを使用して、露出したすべての配線と接続部をしっかりと絶縁し、短絡やその他の電気的リスクから保護します。
ソーラー&ワイヤレスLEDストリップライト:持続可能な選択
LEDストリップライトにソーラーとワイヤレス技術を採用することは、より持続可能で便利な照明ソリューションへの動きを反映している:
ソーラーLEDストリップ: 日中はソーラーパネルから電力が供給され、夜間に点灯する。ソーラーパネルが最適な太陽光を受ける位置にあり、最大限の効率を得るために清潔に保たれていることを確認してください。
ワイヤレスLEDストリップ: ワイヤレスLEDストリップは、バッテリーやUSBから給電でき、リモコンやスマートフォンアプリで管理できるため、従来の配線が実用的でなかったり、望ましくない場所に最適です。
よくあるご質問
LEDストリップライトに最適な電源は?
LEDストリップ・ライトは、電源として汎用性がある。標準的な電源アダプターを使用して壁のコンセントに接続したり、USBポートから給電して小型のセットアップに使用したり、ポータブル用途のバッテリーパックで動作させることもできる。太陽光発電を利用すれば、環境に優しい屋外照明ソリューションも実現できる。
USBパワーバンクを使ってLEDストリップライトを点灯させることはできますか?
USBパワーバンクはLEDストリップライトに電力を供給できるため、モバイル照明ソリューションや仮設のための素晴らしい選択肢となります。しかし、明るさと機能性を維持するためには、使用するLEDストリップの長さや種類に応じた十分なアンペア数を供給できるパワーバンクであることが重要です。
LEDストリップライトのちらつきを防ぐには?
まず、LEDストリップライトのちらつきを防ぐために、安定した電圧と電流を供給する安定した電源に接続されていることを確認してください。すべての接続部が締まっているか、腐食していないかをチェックし、LEDストリップの総ワット数よりも高い定格ワット数の電源の使用を検討しましょう。調光器を使用する場合は、LEDに対応していることを確認してください。
LEDストリップライトを設置する際、どのような安全上の注意が必要ですか?
LEDストリップライトを設置する際は、安全性が最も重要です。電源がLEDの電圧要件に適合していることを常に確認し、回路の過負荷を避け、適切な出力の電源を使用してください。さらに、短絡を防ぐため、すべての接続が確実に絶縁されていることを確認してください。湿気の多い場所に設置する場合は、適切なIP定格を持つ耐水性LEDストリップの使用を検討してください。
太陽光発電LEDストリップライトは屋外照明に適しているか?
もちろんです!ソーラーLEDストリップライトは、環境にやさしく、エネルギー消費を抑えることができるため、屋外での使用に最適です。これらのシステムにはソーラーパネルが含まれており、日中に充電し、夜間に照明に電力を供給します。ソーラーパネルが最大限の太陽光を受けるように設置され、システムには照明ニーズを満たすのに十分な容量のバッテリーが含まれていることを確認してください。
結論照明体験の強化
最後に、LEDストリップライトで空間の機能性と雰囲気を最適化するための重要な洞察をご紹介します。十分な情報に基づいた決断を下し、持続可能なソリューションを享受し、自信を持って照明の未来を受け入れてください。
LEDストリップ照明のダイナミックな世界を探求する私たちは、革新と品質の最前線にいる信頼できるメーカーと提携しなければならない。 ユニトップ中国有数の LEDストリップライト そして LEDネオンフレックスユニトップは、最高水準の照明ソリューションを提供することをお約束します。Unitopのエキスパートチームが、お客様のご要望に合わせたサポートとガイダンスを提供いたします。ご遠慮なく 伸ばす そして、ユニトップがLED業界で傑出した存在であるための、プロフェッショナルなサービスと優れた製品を体験してください。自信と創造性をもって空間を照らすために、今すぐご連絡ください。
関連記事

トムは現在、セールスマネージャーとして ユニトップ(中国)有限公司.になっているそうです。 LED照明 2005年入社。セールス&マーケティング、工場管理の専門家である。ボディビルが好きで、熱狂的なアップルファンでもある!努力家で、新しいことを学び、試すのが大好きです。
電子メール tom@unitopledstrip.com WhatsAppです: +86-18680307140


返信を残す
ディスカッションに参加したい方はこちらお気軽にご投稿ください!