Are you experiencing issues with your LED strip lights after cutting? You’re in good company. With our comprehensive guide, you’ll quickly move from frustration to solution. We’re here to demystify the process and ensure your lighting project shines brightly again.
LED strip issues post-cut often stem from incorrect cutting points or compromised connections. Correct cutting at designated markers and securing connections are essential for resolution.
Dive deeper into our expert guide for resolving and preventing LED strip issues after cutting. From troubleshooting tips to preventive measures, we have all your insights for a luminous outcome.
Initial Troubleshooting Steps for Non-Working LED Strips
When embarking on an LED strip project, the excitement of creating a vibrant lighting setup can quickly become frustrating if the lights fail to illuminate post-cutting. Fortunately, not all hope is lost when your LED strips don’t work as expected. The key to solving this problem often lies in understanding the common pitfalls associated with cutting LED strips and knowing the initial steps to troubleshoot these issues effectively.
The process begins with some basic yet critical checks that can help identify the problem. This initial phase of troubleshooting is crucial as it can save you time and effort, as well as potentially the cost of replacing your LED strips unnecessarily. Let’s dive into the essential first step that could bring your lighting project back from the brink.
The Importance of Visual Inspection
The first step in troubleshooting non-working LED strips is a comprehensive visual inspection. This might seem overly simplistic, but you’d be surprised at how often the root cause of the issue can be spotted just by looking closely. Visual inspection is your first defense, a straightforward yet effective diagnostic tool that should never be underestimated.
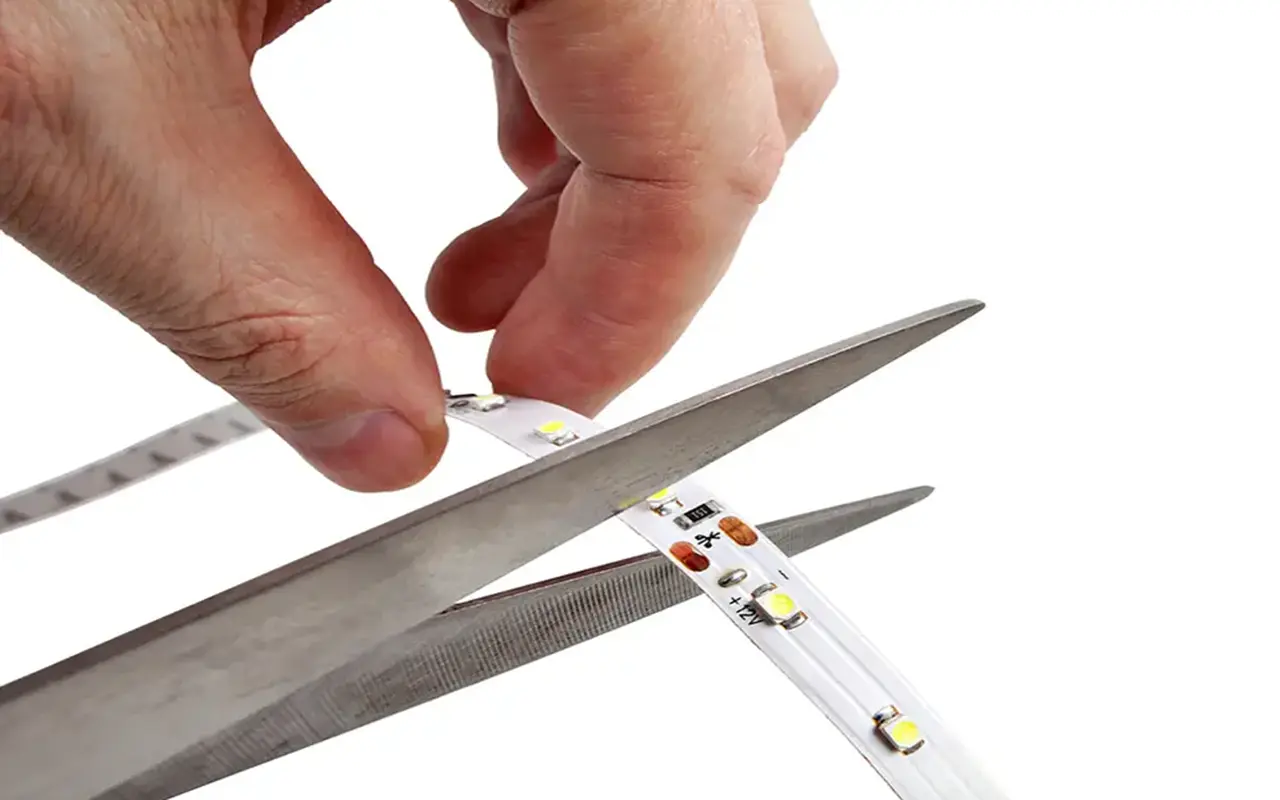
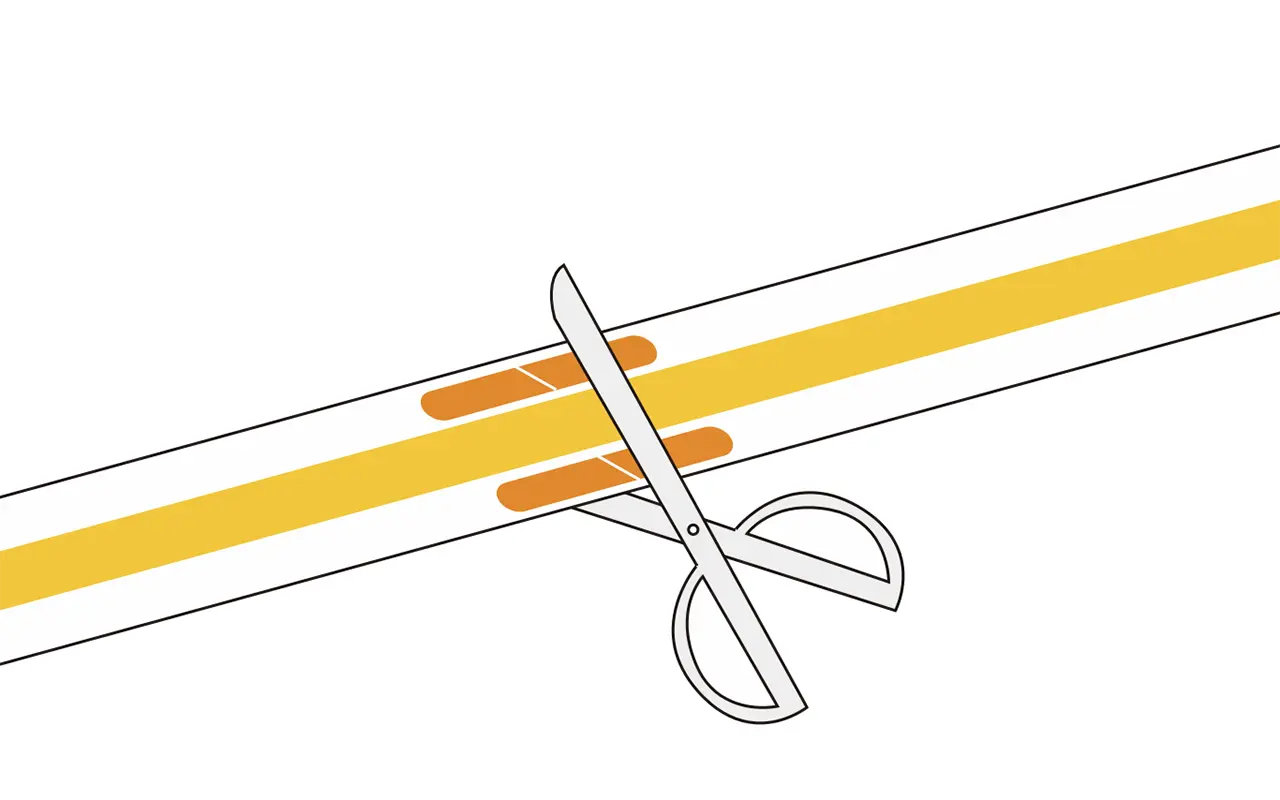
During this inspection, you’re looking for any signs indicating why the LED strip is not functioning. Incorrect cutting is a common culprit. LED strips are designed with specific areas that are safe to cut, marked by lines, icons, or scissor symbols. Cutting outside these designated areas can disrupt the circuit, leading to malfunctions. If the cut seems jagged or it is evident that the cut was made between the designated cut points, this could be the reason your LED strip isn’t lighting up.
Another issue to look out for is damaged connectors. Connectors play a pivotal role in the functionality of LED strips, especially when connecting two strips together or attaching the strip to a power source. Damage to these connectors, whether through incorrect installation or physical damage, can break the circuit or cause an unreliable connection. Inspect the connectors for any signs of wear and tear, loose wires, or if they haven’t been fully clicked into place.
This initial visual check is also an excellent opportunity to ensure that the strip has been installed correctly and that there are no obvious physical damages, such as tears or breaks. Additionally, ensure that the LED strip is correctly aligned with the power source’s polarity; reversing these connections can prevent the strip from working.
Testing for Electrical Continuity
After a visual inspection, if no clear issues are identified, the next step in troubleshooting your non-working LED strips post-cut is to check for electrical continuity. This is where a multimeter becomes indispensable in your LED lighting toolkit. A continuity test will help you verify that electrical current can flow unimpeded through the LED strip, an essential factor for its operation.
To perform this test, you must set your multimeter to the continuity setting, symbolized by a sound wave or diode symbol on most models. Begin by turning off the power to the LED strip to ensure your safety during testing. Attach the multimeter’s probes to each end of the LED strip – one probe to the beginning where the strip connects to the power source and the other to the end of the strip. A continuous circuit will prompt the multimeter to emit a tone, indicating that electrical current can flow through the strip without obstruction.
This step is crucial for identifying breaks or faults in the circuit that are not visible to the naked eye. Breaks in the circuit can occur due to several reasons, including improper handling, excessive bending, or a poorly executed cut. Identifying such breaks is vital, as they can prevent the LED strip from lighting up entirely or cause segments of it to remain dark.
Performing a continuity test not only helps in diagnosing non-functioning strips but also in confirming the integrity of connections between cut segments. If the continuity test fails, it may indicate the need for a closer inspection of the cuts made or the connections established, guiding you towards a more targeted approach in troubleshooting and fixing the issue.
Verifying Power Supply and Voltage
Ensuring your LED strip receives the correct power supply and voltage is paramount to its functionality. An incorrect power supply or mismatched voltage can lead to underpowered LED strips that fail to light up or damage the LEDs.
To verify that your power supply and voltage match the LED strip’s requirements, start by reviewing the specifications provided by the manufacturer. LED strips typically operate on low-voltage DC power; 12V and 24V are common. It’s essential to match the voltage of your power supply with the voltage rating of your LED strip to ensure optimal performance and prevent potential damage.
Additionally, consider the power supply’s capacity. It must be capable of supplying enough current to power the entire LED strip length. A simple way to determine this is by calculating the wattage per meter of the LED strip (also provided by the manufacturer) and multiplying it by the total length of the strip you use. The resulting total wattage should be within the power supply’s capacity to ensure it can adequately power the strip.
Another key factor is the quality of the power supply. Low-quality power supplies may not provide a stable voltage, leading to flickering lights or premature failure of the LED strips. Investing in a high-quality, reliable power supply from a reputable manufacturer can save you from future headaches and ensure your LED lighting project remains bright and functional over time.
Verifying the power supply and voltage is not just a step in troubleshooting; it’s a proactive measure to prevent issues with your LED strips. Ensuring that your setup meets the required specifications allows you to enjoy vibrant, consistent lighting that enhances your space without the risk of underperformance or damage.
Correct Cutting Techniques to Prevent Damage
When customizing LED strips for your space, whether for under cabinet lighting in your kitchen, accent lighting in your living room, or even a creative project, the flexibility to cut and adjust them is a game-changer. However, the magic of LED strips also lies in their sensitivity, requiring precise handling during customization to maintain their integrity and functionality. Let’s delve into the techniques and tools necessary for making those perfect cuts, ensuring your LED strips light up exactly as intended.
Tools You Need for Accurate Cutting
Choosing the right tools for cutting LED strips is the first step toward a successful installation. The importance of using a sharp pair of scissors or utility knives cannot be overstated. A dull tool can fray the edges or crush the circuitry within the strip, leading to poor electrical connections and, ultimately, segments of the LED strip not lighting up.
A utility knife offers control and accuracy for those inclined towards precision, especially when working on a firm, flat surface. This method is ideal for ensuring straight, clean cuts right at the designated points. On the other hand, a sharp pair of scissors might be more accessible and equally effective, provided they offer a clean cut without significant pressure that could damage the strip. Always ensure your cutting tool is in good condition and suitable for the task to avoid unnecessary damage to your LED strips.
Understanding LED Strip Markings
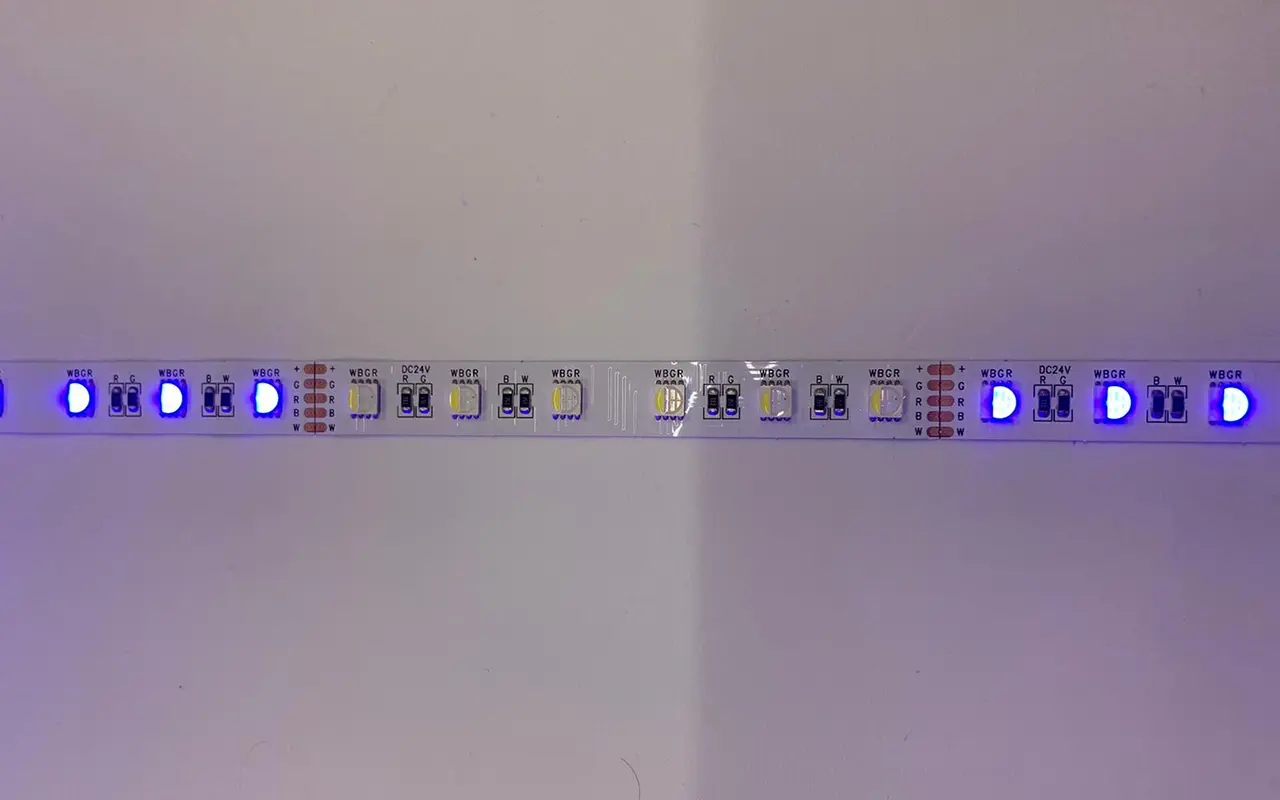
LED strips are ingeniously designed with user customization in mind, featuring designated cutting points along their length. These are usually marked by lines, scissors icons, or sometimes copper dots, indicating safe zones for making cuts. These markings are critical; they signify the points where the strip’s circuitry is designed to be safely interrupted without affecting the overall functionality.
Each segment between these markings is a self-contained circuit. When you cut along these points, you’re ensuring you’re not interrupting the flow of electricity mid-circuit, which can render part of your LED strip inoperative. Familiarizing yourself with these markings before you make the first cut can save you from the disappointment of non-working lights and the frustration of unnecessary troubleshooting.
Avoiding Common Cutting Mistakes
Mistakes can happen even with the best tools and a clear understanding of where to cut. One of the most common errors is cutting outside the designated cutting points. This usually occurs when the markings are overlooked or when trying to fit the LED strip into a space that requires a length not aligned with these points. Such cuts can disrupt the circuitry, leading to portions of the LED strip not lighting up.
Another mistake is making cuts while the strip is powered on, which poses a risk of electrical shock and can damage the LEDs themselves. Always ensure the strip is disconnected from any power source before making cuts.
Lastly, applying too much pressure or using blunt tools can damage the strip’s components, even if cutting in the right place. A gentle approach with the right tool is key to preserving the delicate circuitry within the strip.
Establishing Secure Connections After Cutting
Once you’ve mastered cutting LED strips accurately, the next critical step is re-establishing a secure connection. This phase is crucial; a poorly executed connection can lead to dim sections, intermittent lighting, or total failure. Whether you’re extending your LED strips, creating custom layouts, or simply resizing your setup, the integrity of your connections determines the success and longevity of your lighting project.
Soldering Tips for Durable Connections
Soldering is the go-to method for those seeking the most durable and reliable connections between LED strip segments. While requiring more finesse and the right equipment, it’s a method that pays off with its robustness over time. Here are some soldering tips to ensure your connections last:
Preparation is Key: Before you heat your soldering iron, ensure the ends of the LED strips and the wires you use are clean and debris-free. A clean surface ensures better adhesion and a stronger connection.
Use the Right Solder: A rosin-core solder is ideal for LED strips. It melts smoothly and creates a secure bond without additional flux.
Temperature Matters: Set your soldering iron to the right temperature. Too hot, and you risk damaging the LED strip’s circuitry. Around 350°C (662°F) is a good starting point for most soldering tasks involving LED strips.
Tin the Tips: Apply a small amount of solder to the iron tip and the points on the LED strip where you’ll connect. This process, known as ‘tinning,’ helps improve heat transfer and makes the actual soldering process smoother.
Quick and Precise: When making the connection, be quick but precise. Hold the soldering iron against the connection point just long enough for the solder to melt and flow, then remove it. This minimizes the risk of heat damage.
Check Your Work: After soldering, inspect your connection. A good solder joint is smooth and shiny and covers the contact point entirely without spilling over onto other components.
How to Use Snap-On Connectors
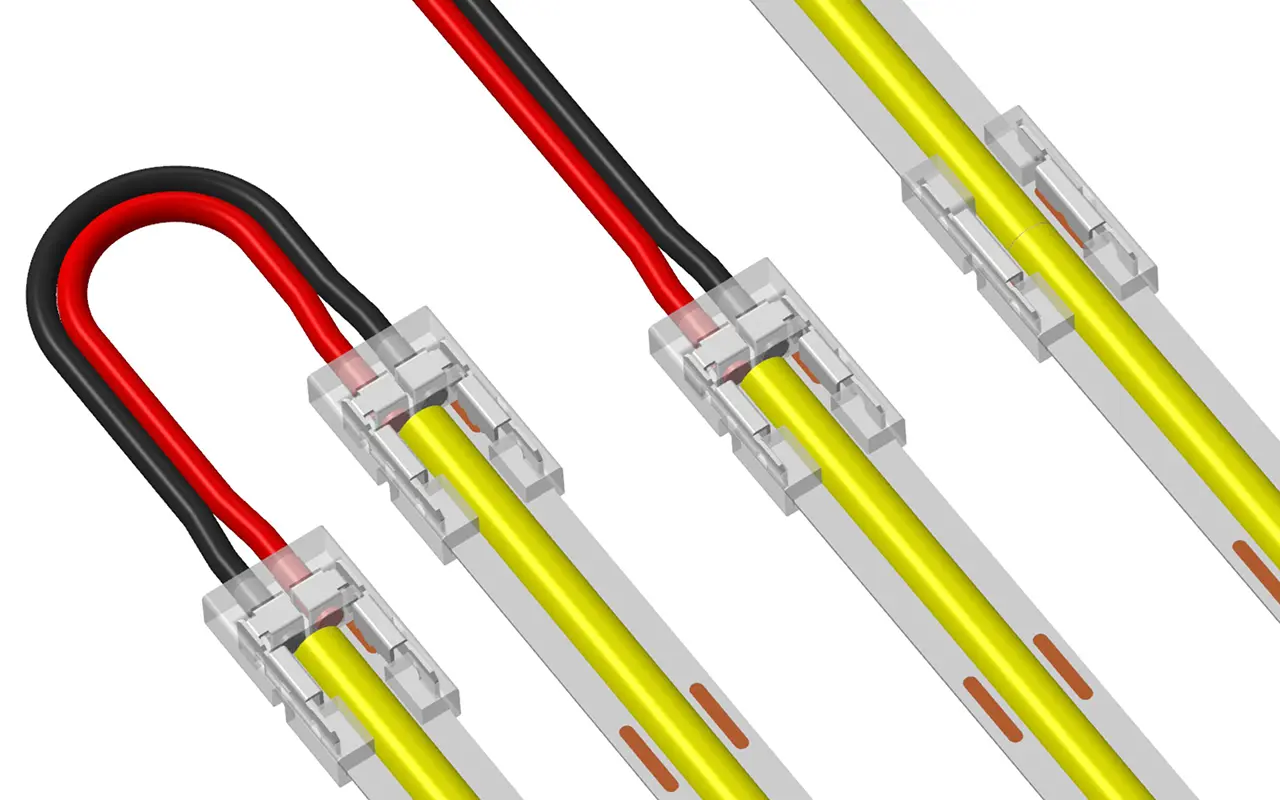
For those who prefer a less technical method, snap-on connectors offer a convenient alternative to soldering. They’re especially handy for quick projects or those less comfortable with a soldering iron. Here’s how to use them effectively:
Select the Right Connector: Ensure the connector matches your LED strip type (e.g., RGB, single color) and width. Using the wrong connector can result in a poor fit and unreliable connection.
Preparation: Like soldering, the area of the LED strip you connect should be clean. Trim any frayed ends to ensure a smooth insertion into the connector.
Insertion: Gently slide the LED strip into the connector, ensuring the electrical contacts align perfectly with the connector’s pins. For strips with an adhesive backing, you might need to peel back a small section to expose the contacts.
Secure the Connection: Close the connector’s clamp or cap once the strip is in place. This should firmly press the strip’s contacts against the connector’s pins, establishing a connection.
Test Before Finalizing: Before fully committing to the placement, connect your LED strips to a power source and check that the lighting works as expected. This step helps catch any issues before they become harder to fix.
Ensuring a Stable Connection: A Checklist
Ensuring a stable and secure connection is vital whether you’ve solder or use snap-on connectors. Here’s a quick checklist to help ensure your connections hold up over time:
Inspect Visually: Look for any obvious signs of a poor connection, such as loose wires or solder joints that don’t fully cover the contact points.
Test Functionality: Always test your LED strips after making connections. Look for any dim areas or color inconsistencies.
Protect Your Work: Use heat-shrink tubing or electrical tape over your connections to protect them from physical damage and environmental factors.
Avoid Stress Points: Ensure the connections aren’t under tension when installing your LED strips. Strain can weaken or break the connections over time.
By following these steps and tips, you’ll ensure that your LED strips not only light up beautifully but also maintain their brightness and functionality long into the future.
Preventing Polarity Mistakes
When embarking on an LED strip lighting project, one crucial step that can’t be overlooked is ensuring the correct polarity is maintained. Polarity refers to the electrical directionality; for an LED strip to light up, the electrical current must flow from the positive to the negative end. Misconnecting these can lead to a non-functional LED strip, a common issue for many DIY enthusiasts. Let’s delve into how you can avoid this common pitfall, ensuring your lighting project illuminates just as intended.
Reading and Understanding Polarity Symbols
The first line of defense against polarity mistakes is to become familiar with the polarity symbols. These are typically indicated on both your LED strip and power source. The positive end is usually denoted by a plus sign (+), and the negative end by a minus sign (-). These symbols are not just random markings; they guide you in connecting your LED strip correctly.
Understanding and respecting these symbols is crucial. Before making any connections, take a moment to identify these markings on your LED strip. This simple step can prevent the frustration of discovering your lights won’t turn on after all your hard work. Additionally, when extending or connecting multiple strips, ensure that the polarity matches across all connections. Consistency is key.
Multimeter Basics for DIYers
A multimeter, a versatile tool in any DIYer’s toolbox, can be invaluable when working with LED strips. Not only does it help verify the presence of electrical current and identify shorts, but it also plays a pivotal role in confirming polarity.
To use a multimeter for checking polarity, set it to the continuity test symbol, often depicted as a diode symbol. Attach the multimeter’s probes to the LED strip’s power input terminals – red to positive and black to negative. A correct polarity will show a reading, whereas a reversed polarity will not. This test can quickly assure you that the LED strip is ready to be powered correctly.
Learning to use a multimeter is a small investment of time that pays off significantly, making it a must-have skill for any serious DIY LED project. It not only aids in preventing polarity mistakes but also enhances your overall understanding of how your LED lighting works.
Correcting Inverted Polarity: A Step-by-Step Guide
If you find yourself in a predicament where the polarity has been inverted, don’t despair. Correcting this mistake is straightforward if you follow these steps:
Identify the Mistake: Use your multimeter to confirm the polarity mistake. Check the connections against the polarity markings on your LED strip and power source.
Power Off: Ensure the power source is disconnected before attempting any corrective measures. Safety first.
Reconnect Correctly: Gently disconnect the wires or connectors. Then, referring to the polarity symbols, reconnect them in the correct order. Positive to positive (+ to +) and negative to negative (- to -).
Retest: Using your multimeter, retest the connections to ensure that the polarity is now correct. Look for a continuity reading as confirmation.
Power On: Once you’re confident that the polarity is correct, reconnect your power source. Your LED strip should light up, indicating success.
Inverted polarity is a common hiccup that can easily be corrected. By familiarizing yourself with the basics of reading polarity symbols, using a multimeter, and understanding how to rectify mistakes, you ensure the success of your LED lighting projects. These skills not only save time and frustration but also empower you to tackle more complex lighting installations with confidence.
Frequently Asked Questions (FAQ)
How do I ensure my LED strip lights work after cutting them?
To ensure your LED strip lights work after cutting, always make cuts at the designated cut points marked on the strip. After cutting, secure connections properly using either soldering for a permanent fix or snap-on connectors for an easier solution. Additionally, double-check the polarity is correct to prevent installation mishaps.
What are the signs that I need professional help with my LED lighting project?
You might need professional assistance if your project involves complex electrical wiring, installations in outdoor or wet areas, or advanced customization beyond your comfort level. Also, if troubleshooting doesn’t resolve flickering or non-functioning strips, a professional can offer a reliable solution.
Can incorrectly cutting LED strips damage them?
Yes, cutting LED strips incorrectly can damage them. Cutting outside the designated cut points can interrupt the circuitry, leading to sections of the strip not lighting up. Always use sharp tools and follow the marked lines or icons to avoid damaging your LED strips.
What’s the best way to maintain LED strip lights for longevity?
Regular maintenance is key to the longevity of your LED strip lights. This includes checking connections, inspecting for physical damage, cleaning the strips to maintain brightness, and monitoring for dimming, which might indicate power supply issues. Proper handling and storage also play a significant role in extending their life.
How do I choose the right power supply for my LED strip lights?
To choose the right power supply, match the output voltage to your LED strip’s voltage requirement and ensure the power supply’s wattage exceeds the total wattage of your connected strips. Consider investing in a high-quality LED driver with safety certifications for enhanced performance and safety.
Konklusion
Wrapping up our journey through the nuances of LED strip lighting, it’s clear that a successful project hinges not just on the cut but on the thoughtful consideration of each step—from planning and execution to the crucial final touches of connection and maintenance. Whether you’re facing the challenge of a non-functioning LED strip post-cut or simply looking to ensure the longevity and brilliance of your lighting, the guidance provided here sets a foundation for lighting projects that not only illuminate but inspire.
Unitop stands as one of China’s premier manufacturers of LED lysbånd og LED neon flex, bringing a wealth of knowledge and an unwavering commitment to quality to the table. If you’re navigating through complex installations, seeking advice on the best materials for your project, or have any questions that delve deeper into the world of LED lighting, don’t hesitate to Kontakt os. Let Unitop be your ally in transforming your space with light, where every cut leads to a brighter outcome.
Relaterede artikler

Tom er nu salgschef for Unitop (Kina) Co, Limited. Han har været i LED-belysning industrien lige siden 2005. Han er ekspert i salg og marketing samt fabriksledelse. Han kan lide bodybuilding, og han er også en vild Apple-fan! Han er en hårdtarbejdende fyr og elsker at lære og prøve nye ting.
E-mail: tom@unitopledstrip.com WhatsApp: +86-18680307140



Skriv en kommentar
Vil du deltage i diskussionen?Du er velkommen til at bidrage!